5-Minute Crafts for School Girl: Quick and Fun Ideas
Do you ever find yourself in a rush, scrambling for creative ideas just before heading off to school? We’ve all been there.
As a school girl, you have busy mornings packed with tasks and sometimes, little time for creativity. But what if you could make something amazing in just five minutes? That’s right! Quick and delightful crafts that add a splash of fun to your school day are completely possible.
Whether you need a last-minute gift, a personalized touch for your school supplies, or just a little something to brighten your day, these five-minute crafts are your go-to solution.
Dive in and discover how you can transform simple materials into charming creations effortlessly. Get ready to impress your friends and make your school days a little more exciting!
Diy Bookmark Ideas
Discover quick and fun bookmark ideas perfect for school girls. Transform simple materials into colorful bookmarks in just minutes. Crafting becomes an exciting activity with these easy DIY projects.
Crafting your own bookmarks can be a fun and creative way to add a personal touch to your school supplies. Imagine flipping open your textbook to find a unique bookmark that not only saves your spot but also reflects your style.
Whether you’re a fan of vibrant colors, intricate patterns, or simple elegance, creating DIY bookmarks can be a delightful and rewarding experience.
1. Paperclip Monsters
Turn ordinary paperclips into quirky bookmarks with just a few materials. Grab some colorful paperclips and googly eyes from your craft box. Glue the googly eyes onto the top of the paperclip to create a cute monster face. You can even add small pieces of felt or paper for ears or mouths to give each monster its own personality.
2. Washi Tape Bookmarks
Washi tape is a versatile crafting tool that can transform plain paper into vibrant bookmarks. Cut a strip of cardstock to your desired bookmark size.
Wrap different patterns of washi tape around the cardstock, layering them for a unique design. Trim the edges to keep it neat and, voilà, you have a personalized bookmark.
3. Button And Ribbon Bookmarks
This craft combines buttons and ribbons for a chic bookmark. Choose a ribbon and a button that complement each other. Sew or glue the button onto the end of the ribbon.
Tie the other end of the ribbon into a knot to prevent fraying. The button rests outside the book, while the ribbon marks your page.
4. Paint Chip Bookmarks
Paint chips aren’t just for choosing wall colors—they make great bookmarks too. Pick up some free paint chips from a local store and cut them to your preferred size. Use a hole punch at the top and add a piece of yarn or string. Get creative by adding stickers or doodles for extra flair.
5. Pressed Flower Bookmarks
Bring a touch of nature to your books with pressed-flower bookmarks. Collect small flowers or leaves and press them between heavy books for a few days.
Once pressed, arrange them on a piece of cardstock and cover with clear contact paper to preserve them. This creates a beautiful, natural bookmark that’s both simple and elegant.
Which bookmark idea will you try first? Each project takes just a few minutes and can be done using materials you already have at home. Engaging in these crafts can spark creativity, relieve stress, and add a personal touch to your study sessions.
Creative Pencil Holders
Brighten up a schoolgirl’s desk with creative pencil holders crafted in just five minutes. Transform simple materials like paper rolls and plastic bottles into fun and unique designs. Easy and quick to make, these crafts offer both style and functionality for school supplies.
Creating a unique pencil holder can be a delightful way for school girls to express their creativity. Not only do these DIY projects provide a fun activity, but they also result in something practical for everyday use.
Plus, making your own pencil holder can be a great conversation starter among friends.
1. Upcycled Tin Can Pencil Holder
Transform an ordinary tin can into a vibrant pencil holder. Start by cleaning an empty can thoroughly. Cover it with colorful paper or fabric, securing it with glue.
Add embellishments like stickers, ribbons, or sequins for extra flair. This project can teach you the value of reusing materials. What better way to show off your personality than through your own creation?
2. Decorative Mason Jar Holder
Mason jars aren’t just for storage. They make fantastic pencil holders, too. Paint the exterior with acrylic paint in your favorite color.
Once dry, you can use stencils to add patterns or initials. Tie a ribbon around the neck for a chic finish. This method helps to develop your artistic skills. Can you imagine the joy of seeing your masterpiece on your study desk every day?
3. Origami Pencil Cup
For those who love paper crafts, an origami pencil holder is a perfect choice. Choose a sturdy paper with a fun design. Follow online tutorials to fold your paper into a functional pencil holder. It might take a few tries, but the result is a lightweight and portable holder.
This craft is a brilliant way to improve your concentration and patience. Have you ever tried origami before?
4. Nature-Inspired Pencil Holder
Bring a touch of nature to your desk with a nature-inspired holder. Collect small twigs or stones. Glue them around a cardboard tube or a small box.
Finish with a coat of clear varnish to give it a polished look. This activity connects you to nature, encouraging you to explore your surroundings. How about taking a walk to gather materials?
5. Personalized Photo Holder
Create a pencil holder that doubles as a photo frame. Use a sturdy cardboard box and decorate it with printed photos of friends or family. Cover the photos with clear plastic for protection. Use the space inside for your pencils. This project is a great way to keep loved ones close. Wouldn’t it be lovely to glance at your favorite memories while studying? Crafting your own pencil holder can be incredibly rewarding. Each project is an opportunity to learn something new. Which creative pencil holder will you try first?
Easy Friendship Bracelets
Create colorful friendship bracelets in just minutes. Perfect for school girls, these crafts are easy and fun. A simple way to express creativity and make friends smile.
Are you looking for an easy and fun way to create a special bond with your best friend? Making friendship bracelets is a timeless craft that schoolgirls love. You can make these colorful bracelets in just a few minutes.
They’re simple to create and a great way to show your friends how much you care. Plus, it’s an excellent way to add a personal touch to your style.
Materials You Need
To start, gather your materials. You’ll need embroidery floss in different colors. Choose colors that represent you and your friend’s personality or favorite shades. You’ll also need a pair of scissors and some tape or a safety pin to secure your bracelet while you work.
Setting Up Your Workspace
Find a comfortable spot to work. Lay out your floss in front of you and cut each strand to about 24 inches. Secure the strands with tape to a table or pin them to a cushion. This keeps your work steady and neat. Do you have a favorite spot where you like to do crafts?
Basic Knotting Techniques
Learn the basic knotting technique to make your bracelet. Start by tying all strands together in a knot, leaving a small loop. Separate your strands and choose the first color. Create a knot by forming a ‘4’ shape and pulling the end through. Repeat this with each color until you reach your desired length.
Adding Personal Touches
Once you’ve mastered basic knotting, think about adding personal touches. You can include beads with initials or charms that reflect shared memories. Mixing textures, like adding metallic thread,s can make the bracelet unique. What special touch would make your bracelet stand out?
Sharing And Wearing Your Bracelet
Finally, share your finished bracelet with your friend. It’s an exciting moment to see their reaction. Wear them together as a symbol of your friendship. They can become part of your daily outfit or be kept for special occasions. How do you feel when you give a handmade gift?
Crafting friendship bracelets is more than just a creative activity. It’s a way to celebrate your friendship in a personal and meaningful way. With these simple steps, you’re ready to make a bracelet that both you and your friend will treasure.
Credit: www.dailymotion.com
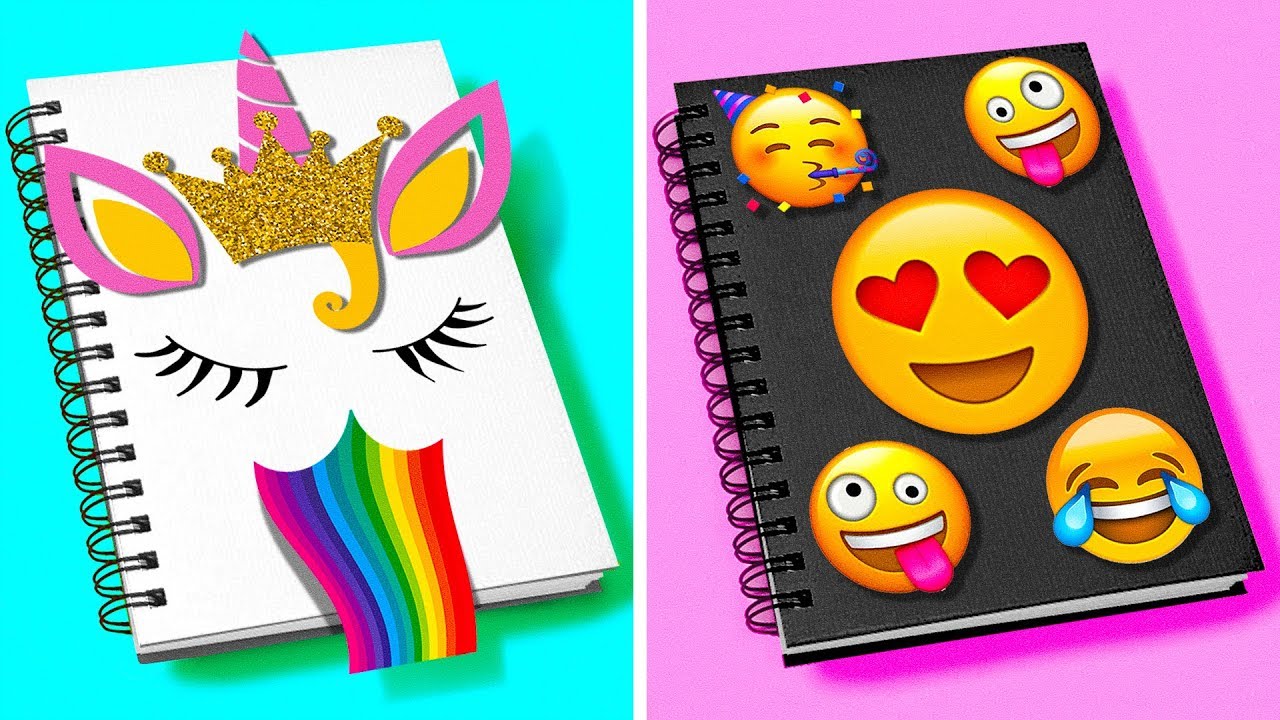
Decorative Notebooks
Decorative notebooks are a delightful way to showcase creativity in school. Girls can transform plain notebooks into personal works of art. This activity not only brightens up their school supplies but also provides a fun crafting experience.
Using simple materials, school girls can express their style and individuality. Let’s explore some delightful ideas to create decorative notebooks.
1.
Washi tape is a colorful, patterned adhesive tape. It’s perfect for decorating notebooks. Girls can layer different patterns for a unique design. This tape is easy to remove and reposition. They can change the designs whenever they like.
2.
Doodling is a fun way to personalize notebook covers. School girls can draw patterns, cartoons, or abstract art. Use colorful markers for a bright and cheerful look. Doodling helps improve creativity and concentration.
3.
Stickers offer endless possibilities for decoration. Girls can choose themes like animals, stars, or their favorite characters. Mix and match stickers for a layered effect. Stickers are easy to apply and change anytime.
4.
Fabric and lace add texture to notebook covers. Cut fabric pieces to fit the cover and glue them on. Add lace trims for a vintage touch. These materials create a unique and tactile notebook.
5.
Glitter makes notebooks shine and catch the eye. Use glue and sprinkle glitter for a sparkly effect. Girls can create patterns or cover the whole surface. Let it dry completely before using the notebook.
Personalized Keychains
Create personalized keychains as a quick craft for school girls. Gather beads, charms, and key rings. Arrange them creatively. Girls can express their style while making something useful. These small projects foster creativity and provide a fun, engaging activity. Perfect for a short break or art session.
Personalized keychains are a delightful and simple craft for school girls. They offer a fun way to express personality and style. With just a few materials and a creative spark, making personalized keychains can be both a rewarding and quick project.
Gather Your Materials
To make a personalized keychain, you’ll need a few basic materials. Grab some key rings, colorful beads, and alphabet letters. You can find these at any craft store or even in your own craft box at home.
Think about adding charms or small trinkets that represent hobbies or favorite animals. This is a great way to make your keychain truly unique.
Create Your Design
Before starting, plan out the design. Decide on a color scheme that you love. Do you want your keychain to spell out your name or a fun word? Place your beads and letters in order before stringing them together.
This helps you visualize the final product and make adjustments if needed.
String It Together
Now it’s time to assemble your keychain. Start by threading your chosen beads and letters onto a strong string or wire. Make sure to tie a knot at the end to secure them in place. Leave a little space at the top to attach your key ring. Double-check that everything is secure and won’t slide off.
Add Personal Touches
Personalization is key to making your keychain special. Consider adding a small tassel or a mini pom-pom for extra flair. If you have a favorite quote or symbol, find a small charm that represents it. This adds a unique touch to your creation.
Show Off Your Creation
Once finished, proudly attach your new keychain to your backpack or pencil case. It’s a reflection of your creativity and style. Why not make a few extra for friends? Personalized keychains make thoughtful and inexpensive gifts for classmates. Personalized keychains are more than just a craft; they’re a form of self-expression. What will your keychain say about you?

Credit: kidsactivitiesblog.com
Colorful Pen Toppers
Create colorful pen toppers in just five minutes. Perfect for a schoolgirl’s craft project. Brighten up any pen with fun designs using simple materials.
Creating vibrant pen toppers is a delightful craft that brings personality to your school supplies. These easy-to-make additions will not only brighten your day but also make your pens stand out in a sea of ordinary stationery.
Materials You’ll Need
Gathering your materials is the first step. You’ll need colorful pom-poms, pipe cleaners, glue, and a variety of beads. If you have old fabric scraps or ribbons, use those too. They add a unique touch to each topper. Make sure your pens have removable caps, as this makes attaching the toppers much easier.
Step-by-step Guide
Start by wrapping the pipe cleaner around the top of the pen. Twist it securely so it doesn’t slip off. Add a dab of glue to a pom-pom and press it onto the end of the pipe cleaner. Hold it for a few seconds to make sure it sticks.
Slide beads onto the pipe cleaner, pushing them up to meet the pom-pom. This adds a bit of sparkle and texture.
Personal Touches
Want to make your pen topper truly yours? Try adding initials or symbols that mean something to you.
Use fabric scraps to create tiny bows or flowers. Glue them onto the pom-pom for extra flair. Consider using themed colors that match your favorite movie or book. Imagine how fun it would be to have a Harry Potter or unicorn-themed pen!
Benefits Of Crafting
Crafting is more than just a hobby; it’s a creative outlet. It helps improve focus and can be a great stress reliever. Do you find yourself getting overwhelmed with schoolwork? Taking a five-minute break to make a pen topper can refresh your mind.
Plus, crafting gives you a sense of accomplishment. Creating something beautiful out of simple materials is incredibly rewarding.
Encourage Your Friends
Invite your friends to join you in making pen toppers. It’s a fun activity that can strengthen friendships. Share your creations and swap ideas. You never know, you might inspire each other to create something even more amazing.
Ask them what colors or designs they would choose. You might discover new styles that you hadn’t considered before. Creating colorful pen toppers is not just a craft; it’s an opportunity to express yourself and add a touch of joy to your everyday school life.
Why settle for plain pens when you can make them extraordinary?
Customizable Lunch Bags
Crafting colorful lunch bags is a delightful project for school girls. Decorate with stickers, drawings, or fabric paint for a personal touch. These quick crafts make lunchtime special and fun.
Customizable lunch bags are a fun and practical craft project that can brighten up a school day for any schoolgirl. With a little creativity and some simple materials, you can transform a plain lunch bag into a unique and personalized accessory.
Not only does this craft allow for self-expression, but it also ensures your lunch bag stands out from the crowd, making it easier to spot in a busy lunchroom. Let’s dive into how you can create a lunch bag that’s as special as you are.
Choose Your Bag
Start with a blank canvas. Pick a simple, plain lunch bag made of fabric or a reusable tote. Make sure it’s durable enough to withstand daily use. Opt for a color you love or go with neutral shades that will let your designs pop.
Gather Your Materials
You’ll need fabric markers, stencils, patches, and iron-on designs. Scissors and fabric glue will come in handy, too. Get creative! Raid your craft box for buttons, ribbons, and beads to add flair.
Create Your Design
Sketch your ideas on paper first. Think about what represents you—favorite colors, quotes, or themes. Once you’re ready, start decorating. Use stencils for neat patterns or freehand for a personal touch.
Add Personal Touches
Incorporate elements that reflect your personality. Sew on a patch from your favorite band or add a charm to the zipper. These little details make your lunch bag truly yours.
Consider Practicality
While creativity is key, don’t forget function. Ensure the decorations don’t interfere with the bag’s usability. Keep embellishments away from zippers and handles.
Show Off Your Creation
Once your bag is complete, flaunt it proudly! Your customized lunch bag is not just a storage item, but a reflection of who you are.
Are you ready to turn heads with your new lunch bag? Imagine the smiles and compliments you’ll get as your friends see your masterpiece. Remember, crafting is not just about the end product; it’s about enjoying the process.
So, gather your materials and let your imagination run wild. What will your lunch bag say about you today?
Crafty Hair Accessories
Create quick and easy hair accessories for school girls in just five minutes. Use ribbons, beads, and bobby pins to make unique designs. Perfect for adding a personal touch to any hairstyle.
Crafty hair accessories can transform a schoolgirl’s look in just minutes. These quick crafts offer a fun way to add personality and flair to everyday hairstyles.
You don’t need to be an expert to make them; a few simple materials and a spark of creativity are all it takes. Imagine the joy of showing off a handmade accessory that stands out in a crowd!
Diy Ribbon Hair Ties
Ribbon hair ties are not only stylish but also gentle on your hair. Cut a piece of ribbon about 12 inches long.
Fold it in half and tie the ends together with a knot. Slip it over your hair tie for an instant upgrade. Try using different colors and patterns to match your outfits.
Button Bobby Pins
Bobby pins don’t have to be boring! Gather some buttons from old clothes or craft stores. Glue them onto the ends of bobby pins using strong adhesive.
Let them dry completely before using. These quirky accessories can add a pop of color to your hairstyle and keep stray hairs in place.
Beaded Headbands
Why settle for plain headbands when you can make them sparkle? Thread colorful beads onto a thin wire, then wrap it around a basic headband.
Secure the ends with a small knot or twist. The beads catch the light and add a playful touch. This is an excellent craft to do with friends—share beads and ideas for unique designs!
Flower Clips
Freshen up your look with flower clips! Use artificial flowers to create long-lasting accessories. Simply remove the flower from its stem and glue it onto a hair clip.
Choose flowers that complement your hair color or your favorite outfit. Imagine the compliments you’ll receive when you wear these charming clips to school.
Decorative Barrettes
Barrettes can be easily customized with stickers, fabric, or paint. Start with a plain barrette and let your imagination run wild. Use fabric scraps to cover the barrette, or paint it with nail polish for a glossy finish.
Consider adding stickers for a fun twist. These personalized barrettes can make any hairstyle pop. Crafting your own hair accessories is a great way to express your style and save money.
Each piece tells a story and reflects your creativity. Which accessory will you try first?
Quick Diy Wall Art
Discover the joy of quick DIY wall art with easy 5-minute crafts. Perfect for school girls, these projects transform spaces with creativity and fun. Simple materials like paper and paint make it accessible and enjoyable.
Creating art can be a delightful experience, and it doesn’t have to be time-consuming or complicated. If your schoolgirl is looking to spice up her room, quick DIY wall art can be a fantastic project. It’s a perfect way to express creativity and add a personal touch to her space, all within a short timeframe.
1. Paper Tapestry Art
Paper tapestry is a simple yet stunning craft. All you need is colored paper, scissors, and some glue. Cut the paper into strips and weave them together like a basket.
The result is a vibrant tapestry that can easily hang on any wall. Try mixing different colors and patterns for a unique look. It’s a great way to use leftover craft supplies and see what beautiful combinations you can create.
2. Painted Canvas With Tape
This project requires a blank canvas, painter’s tape, and acrylic paints. Use the tape to create geometric shapes on the canvas.
Once the tape is in place, paint over the canvas with your chosen colors. When the paint dries, peel the tape away to reveal a striking design. It’s an easy technique that produces impressive results.
3. Nature-Inspired Collage
A nature-inspired collage is a perfect way to bring the outdoors inside. Gather leaves, flowers, and twigs from your backyard.
Arrange them on a piece of cardboard or paper and glue them down. You can also add a splash of paint or glitter for extra flair. This craft not only beautifies the room but also encourages kids to appreciate nature’s beauty.
4. Customized Quote Board
Motivational quotes can brighten any day. Use a piece of corkboard or a simple wooden board. Paint or decorate the board, then use stencils to write a favorite quote.
Add embellishments like stickers or ribbon to make it pop. This board will serve as daily inspiration and a lovely piece of decor.
5. Button Tree Art
Button tree art is a creative way to use old buttons. Start by drawing a tree trunk and branches on a canvas or cardboard. Glue buttons of different sizes and colors on the branches to represent leaves. The result is a whimsical and colorful piece of art. Encourage your schoolgirl to use her imagination and create her own version.
What story does her button tree tell? These quick DIY wall art ideas are not only fun but also a great bonding activity. Why not spend an afternoon crafting together and see what artistic treasures you can create?

Credit: www.youtube.com
Frequently Asked Questions
What Are Easy Crafts For School Girls?
Easy crafts for school girls include making bookmarks, friendship bracelets, and DIY pencil holders. These crafts are simple, require minimal materials, and can be completed quickly. They are perfect for encouraging creativity and providing a sense of accomplishment in a short time.
How Can Crafts Help School Girls?
Crafts can help school girls by enhancing their creativity and fine motor skills. They provide a fun way to express themselves and boost confidence. Engaging in crafts can also improve problem-solving abilities and encourage teamwork when done in groups.
What Materials Are Needed For Quick Crafts?
Quick crafts often require basic materials like paper, glue, scissors, and markers. Additionally, items like yarn, beads, and ribbons can be used for more variety. These materials are typically inexpensive and easily accessible, making it simple to start crafting.
Are Crafts Beneficial For School Projects?
Yes, crafts can enhance school projects by making them more engaging and visually appealing. They allow students to present their ideas creatively, which can lead to better understanding and retention of information. Crafts can also add a personal touch to projects, making them stand out.
Conclusion
Crafting can be a fun, quick break for school girls. These 5-minute projects fit perfectly into busy schedules. They bring creativity without taking too much time. Plus, they use simple materials found at home. Encourage girls to explore their creative side.
It builds confidence and problem-solving skills. Crafts can also be a great bonding activity. Invite friends or family to join the fun. Enjoy creating something unique and personal. Just a few minutes a day can spark joy and imagination. So, grab those supplies and start crafting now!