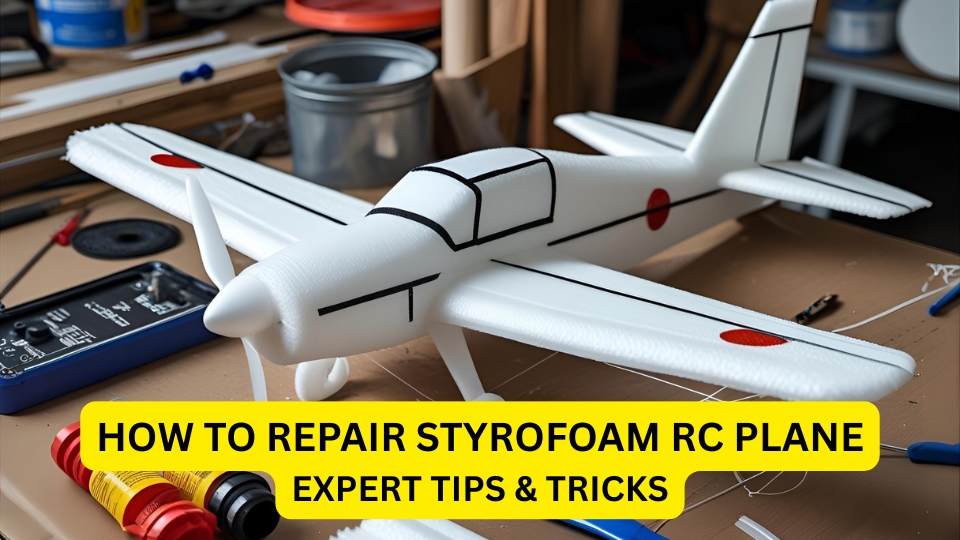
How to Make Rc Plane With Thermocol: Step-by-Step Guide 2025
Imagine the thrill of watching a creation soar through the sky, crafted by your own hands. Building an RC plane from thermocol offers you the chance to experience this excitement firsthand.
This project isn’t just about assembling parts; it’s about unlocking your creativity and discovering the joy of flight in a fun, accessible way. You don’t need a workshop filled with expensive materials. With thermocol, you have a lightweight, affordable, and versatile material right at your fingertips.
Are you ready to dive into the world of RC planes and bring your vision to life? You’ll find easy steps to guide you through the process, practical tips to ensure your aircraft takes off successfully, and clever hacks to personalize your masterpiece. Whether you’re a seasoned hobbyist or a curious beginner, this guide is crafted just for you. Let’s get started and watch your dream take flight!
How to Make RC Plane With Thermocol: Materials Needed
Creating an RC plane with thermocol requires specific materials. Gather thermocol sheets, glue, a small motor, and a propeller. Also, add a remote control, batteries, and basic tools like a cutter and ruler for precision.
Creating an RC plane using thermocol is an exciting project that combines creativity with engineering. Before diving into the building process, understanding the materials needed is crucial. Having the right materials at hand not only makes the construction smoother but also enhances the durability and performance of your RC plane. Let’s explore the essential items you’ll need to get started.
Thermocol Sheets
Thermocol, also known as expanded polystyrene foam, is lightweight and easy to shape. You’ll need sheets of thermocol to form the body and wings of your plane. Look for sheets that are about 5mm thick for optimal flexibility and strength.
Glue
A strong adhesive is key to holding your RC plane together. Use foam-friendly glue, which doesn’t melt the thermocol. Epoxy or hot glue works well but ensure it dries clear and strong for a neat finish.
Carbon Rods
Carbon rods add strength and rigidity to your plane. They are used to reinforce the wings and body. Choose rods that are lightweight yet sturdy to maintain the plane’s aerodynamics.
Motor And Electronics
Selecting a motor and electronic components like servos and a receiver is crucial for flight. Choose a brushless motor for efficiency and longer flight times. Ensure your electronics are compatible with your power source and have enough torque to propel your plane.
Battery
A lightweight lithium polymer battery will provide the necessary power. Choose a battery that offers a balance between weight and capacity. The lighter the battery, the longer your plane can stay airborne.
Control Surfaces
Control surfaces include the rudder, elevators, and ailerons. These parts are critical for maneuvering your plane. Make sure they are cut precisely from the thermocol and reinforced with lightweight materials.
Tools
You’ll need basic tools like a cutter, ruler, and sandpaper. These tools help in precisely cutting and shaping the thermocol. A measuring tape ensures your dimensions are accurate for balanced flight. Taking on this project can be a rewarding challenge.
Have you considered how the choice of materials can affect your plane’s flight performance? Each material plays a vital role, and selecting them wisely can turn a simple hobby into a soaring success.
Designing The Plane
Designing an RC plane with thermocol involves creativity and precision. This process defines the plane’s flight performance. Focus on the shape and weight for the best results. Understand the basics before starting.
Thermocol, also known as Styrofoam, is lightweight and easy to shape. It’s ideal for hobbyists making their first RC plane. Begin by sketching your design on paper. Visualize your plane’s appearance and functionality.
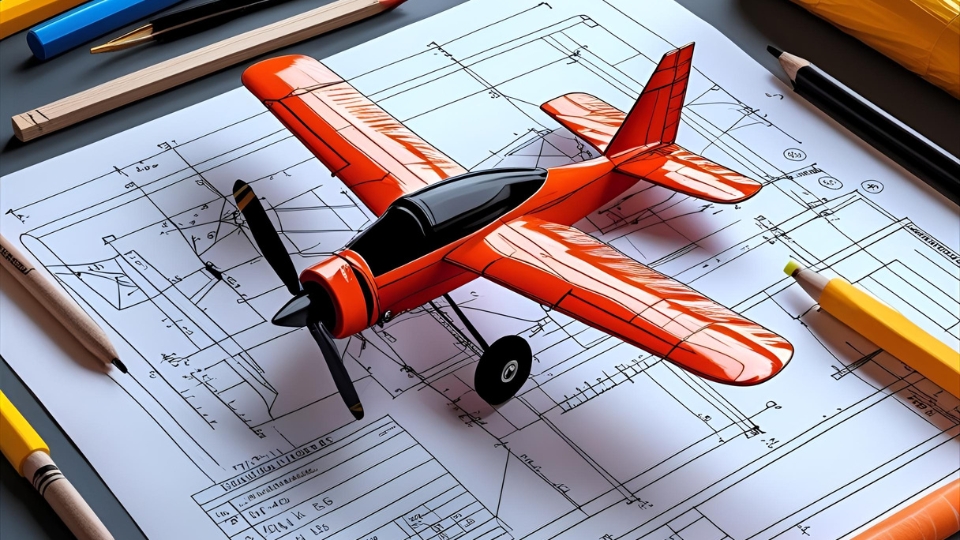
Creating The Blueprint
Start by drawing a simple blueprint. Use graph paper for accuracy. A blueprint guides your building process. Include dimensions and scale in your drawing. Keep the design straightforward for easy construction.
Consider the wingspan and fuselage length. These affect the plane’s balance and control. Ensure your design supports stability and aerodynamic efficiency. A well-planned blueprint reduces mistakes during construction.
Selecting The Right Wing Design
Wings are crucial for lift and stability. Choose a design that suits your flying conditions. Simple rectangular wings are ideal for beginners. They provide steady lift and are easier to construct.
Consider dihedral angles for stability. These angles help maintain balance during flight. A moderate dihedral offers better control for new pilots. Sketch the wing shape with precise measurements.
Designing The Fuselage
The fuselage houses the electronics and battery. It connects all parts of the plane. Keep it lightweight to improve flight performance. A streamlined design reduces air resistance.
Ensure the fuselage is sturdy enough to hold components. Include space for wiring and battery placement. A well-designed fuselage enhances your plane’s flight duration.
Adding Control Surfaces
Control surfaces manage the plane’s direction and altitude. Essential surfaces include ailerons, elevators, and rudders. Each serves a specific purpose during flight.
Design these surfaces to fit your wings and tail. They should be responsive and easy to adjust. Properly aligned control surfaces ensure smooth maneuverability.
Balancing The Weight
Balance is key for stable flight. Distribute weight evenly across the plane. Position the center of gravity slightly ahead of the wings. This setup promotes better control.
Test the balance by holding the plane at the center. Adjust components until the plane remains level. A well-balanced plane responds predictably to pilot inputs.
Cutting The Thermocol
Creating an RC plane with thermocol is exciting. The process requires precision during cutting. Properly cut thermocol ensures stability and balance of the aircraft. This step is crucial for a successful build.
Understanding Thermocol Sheets
Thermocol sheets come in various thicknesses. Choosing the right thickness is key. Thicker sheets offer more strength. Thinner sheets are easier to cut and shape. Consider the size and weight of your plane.
Tools Required For Cutting
Using the right tools makes cutting easier. A sharp cutter or knife is essential. Ensure the blade is clean and sharp. A ruler helps in measuring straight lines. Markers help guide your cuts.
Marking The Design
Start by marking the design on the thermocol. Use a pencil for precise lines. Sketch the outline of your RC plane’s wings and fuselage. Double-check measurements before cutting. This prevents mistakes and wastage.
Cutting Techniques
Cut slowly and steadily for accuracy. Follow the marked lines closely. Start with gentle pressure and increase gradually. Use smooth strokes to avoid rough edges. Take breaks to maintain focus and precision.
Safety Precautions
Always prioritize safety while cutting. Wear gloves to protect your hands. Ensure the work area is clean and well-lit. Keep tools away from children. Dispose of waste thermocol responsibly.
Constructing The Fuselage
Creating the fuselage of an RC plane with thermocol is an exciting project. This part forms the main body of your aircraft. It’s essential for housing electronic components. Proper construction ensures stability during flight.
Start by gathering necessary materials. Thermocol is lightweight and easy to shape. Prepare tools like a cutter, ruler, and glue. Precision is key for a successful build.
Designing The Fuselage Template
Draw a simple outline on paper. This will serve as your guide. Keep the design symmetrical for balance. Use a ruler to ensure straight lines. Accuracy in design leads to a better flight.
Place the template on the thermocol. Carefully trace the outline. Use a sharp cutter to slice through thermocol. Make smooth, clean cuts to avoid rough edges. Handle the cutter with care to prevent injuries.
Assembling The Fuselage Parts
Join the cut pieces using glue. Ensure parts fit snugly together. Apply glue evenly to avoid lumps. Hold pieces in place until the glue sets. A well-glued fuselage maintains structural integrity.
Reinforcing The Fuselage
Add strips of tape for extra strength. This prevents damage during rough landings. Reinforcement keeps the fuselage intact. It’s an essential step for durability.
Testing The Fuselage
Check for any loose parts. Shake gently to test stability. Ensure it can withstand minor impacts. A solid fuselage performs well in flight.
Final Touches
Smooth out any rough edges. Add paint or decals for aesthetics. A well-designed fuselage looks appealing. These touches complete your thermocol fuselage.
Building The Wings
Creating the wings of an RC plane is a fun challenge. It’s the most essential part of the build. Wings give the plane lift and stability. With thermocol, you can craft lightweight and durable wings.
Thermocol is easy to shape and cut. It is also affordable. This makes it ideal for hobbyists and beginners. Let’s dive into the steps to build the wings.
Step 1: Gather Your Materials
You’ll need a few tools and materials. Thermocol sheets, a cutter, and sandpaper are essential. You also need a ruler and a pencil for marking. Have some glue or adhesive tape ready for assembly.
Step 2: Design The Wing Shape
Use a pencil to sketch your wing design. Keep the shape balanced and straightforward. A rectangular or slightly tapered design works well. Ensure each wing is symmetrical for balance in flight.
Step 3: Cutting The Thermocol
Carefully cut the thermocol following your design. Use a sharp cutter for clean edges. Work slowly to avoid breaking the sheet. Cut both wings to the same size and shape.
Step 4: Shaping The Wings
Once cut, sand the edges smoothly. This reduces drag and improves aerodynamics. Ensure the leading edge is slightly rounded. Keep the trailing edge sharp for better lift.
Step 5: Reinforce The Wings
Use adhesive tape to strengthen the wings. Apply tape along the leading and trailing edges. This prevents damage during flight. It also adds extra durability.
Step 6: Attach The Wings To The Fuselage
Align the wings with the fuselage. Ensure they are centered and level. Secure them using glue or tape. Check for stability by holding the plane at its center. It should balance without tipping.
Step 7: Test The Wings
Before flight, test the wings for performance. Hold the plane and simulate a flight motion. Feel for any resistance or imbalance. Make adjustments if needed.

Credit: www.youtube.com
Attaching The Tail
Attaching the tail is a crucial step in building your RC plane. It ensures stability and control during flight. A well-attached tail helps the plane respond accurately to your commands. Let’s explore how to attach the tail with ease and precision.
Gather Your Materials
First, gather all necessary materials for tail attachment. You will need thermocol, a craft knife, and adhesive. Tape can be helpful for extra support. Ensure all tools are within reach.
Cut The Tail Pieces
Use the craft knife to cut the tail sections from thermocol. Ensure the pieces are symmetrical and smooth. The tail usually consists of a vertical stabilizer and a horizontal stabilizer.
Attach The Horizontal Stabilizer
Place the horizontal stabilizer at the rear of the plane’s body. Apply a thin layer of adhesive to the edge of the stabilizer. Firmly press it against the plane’s body. Hold it in place until the adhesive sets.
Position The Vertical Stabilizer
Align the vertical stabilizer perpendicular to the horizontal one. Apply adhesive to its base. Carefully position it in the center of the horizontal stabilizer. Make sure it’s straight and secure.
Reinforce The Tail
Use tape to reinforce the joints where the tail pieces meet. This will add strength and prevent wobbling during flight. Ensure the tape is tightly wrapped around the joints.
Check Alignment
Double-check the alignment of the tail. Both stabilizers should be perfectly aligned. This ensures optimal flight performance and control.
Installing Electronics
Creating an RC plane with thermocol involves careful planning and assembly. Start by designing the plane’s structure, ensuring a lightweight build. Then, install electronic components like the motor and controller for smooth operation.
When building an RC plane from thermocol, installing the electronics is where the magic begins. This step transforms your static model into a dynamic flying machine. It’s not just about connecting wires; it’s about bringing your creation to life. You might feel a bit overwhelmed, but with careful attention, you can master this step.
Choosing The Right Electronics
Selecting the right components is crucial for flight success. You’ll need a transmitter and receiver, servos, a motor, an electronic speed controller (ESC), and a battery.
Ensure your components are compatible with each other. If you’re unsure, visit a local hobby shop or join an online RC community for advice.
Positioning The Components
Placement affects your plane’s balance and performance. Mount the motor at the nose for optimal thrust. Position the battery close to the center for even weight distribution. Secure the receiver and ESC where they’re easily accessible. A misaligned component can cause unexpected flight issues.
Connecting The Electronics
Connecting the components can be tricky but rewarding. Use a soldering iron to attach wires for a secure connection. Ensure the cables are not tangled and have enough slack for movement. Test each connection before moving to the next step. This prevents frustrating troubleshooting later.
Calibrating The Controls
Calibration ensures that your plane responds correctly to your commands. Bind your transmitter to the receiver and test the servos. Adjust the control surfaces using the transmitter until they move smoothly. Spend time on this step; precise controls make flying more enjoyable.
Conducting A Pre-flight Check
Before taking to the skies, conduct a thorough pre-flight check. Inspect all connections and ensure nothing is loose. Test the motor and controls in a safe environment. Ensure everything functions as expected.
This step builds confidence and reduces the risk of mid-air failures. Installing electronics in your RC plane is a thrilling milestone. It’s where creativity meets technical skill.
Have you ever thought about how each component works together to create flight? Take your time, enjoy the process, and soon, you’ll be ready for your maiden flight.
Balancing The Plane
Creating an RC plane from thermocol requires attention to weight distribution for proper balance. Cutting the thermocol precisely helps maintain stability during flight. Adjusting the placement of components ensures the plane’s weight is evenly spread, crucial for smooth operation and control in the air.
Balancing a remote-controlled (RC) plane crafted from thermocol is crucial for its flight performance. A well-balanced plane ensures stability, smooth flight, and responsive controls. Without proper balance, your aircraft might tilt, crash, or fail to take off. Let’s dive into the specifics of balancing your thermocol RC plane effectively.
Understanding Center Of Gravity
The center of gravity (CG) is where your plane balances perfectly. It’s typically located slightly ahead of the wings’ midpoint. To find this spot, gently lift your plane with two fingers under the wings. Adjust until it stays level. If it tips forward or backward, you’ll need to reposition the weight.
Adding Weights For Stability
Sometimes, achieving the perfect balance requires adding small weights. Tape a few coins or small nuts to the nose or tail. Start with a bit of weight and test the balance again. It’s surprising how a tiny adjustment can make a massive difference in flight performance.
Aligning The Wings And Tail
Wings and tail alignment play a vital role in balance. Ensure both wings are level with each other. Check that the tail is straight and not tilted. Misalignment can cause your plane to veer off course. Use a ruler or straight edge to make precise adjustments.
Personal Experience With Balancing
I once built a thermocol plane that refused to fly straight. After hours of frustration, I realized the wings were slightly off-center. A quick adjustment fixed it. It taught me how critical attention to detail is in balancing. Have you ever overlooked a tiny detail that led to a big problem?
Testing The Balance
Before the maiden flight, perform a balance test by gliding the plane from your hand. Watch how it behaves. If it dips, adjust the weights or recheck the alignment. Testing saves time and prevents crashes. It’s always better to tweak on the ground than to risk a flight failure.
Balancing your RC plane is an art that combines science and patience. With each adjustment, you’ll learn more about how your aircraft responds. What unique challenges have you faced while balancing your RC plane?
Video: https://www.youtube.com/watch?v=VeZ60SsBzas
Testing And Adjustments
Testing and adjustments are crucial steps in crafting a thermocol RC plane. These steps ensure your plane flies smoothly in the sky. It’s time to see your creation in action.
Preparing For Flight
Ensure the plane is assembled securely. Check all connections and parts. Make sure everything is in place. A stable assembly leads to a better flight.
Initial Test Flight
Find an open space for your test flight. A park or field is ideal. Launch the plane gently and observe its motion. Watch how it flies and lands.
Identifying Issues
Notice any flight problems. Does it tilt or struggle? These issues need fixing. Adjust the wings and tail if needed.
Fine-tuning The Controls
Adjust the remote controls for better handling. Make small changes to the settings. Test these adjustments during flight. The aim is smooth control.
Balancing The Weight
Check the weight distribution on the plane. Uneven weight can affect flight. Balance the weight by adding or removing items. This helps stabilize your aircraft.
Repeating The Tests
Conduct multiple test flights. Each flight provides valuable feedback. Use this feedback to make further adjustments. Repeat until the plane flies perfectly.
Credit: www.rsismartcap.com
Frequently Asked Questions
What Materials Are Needed For An RC Plane?
To build an RC plane, you’ll need thermocol, glue, a motor, propellers, a transmitter, and servos. Additionally, include wheels, wires, and a battery. These materials form the basic components of your RC plane, ensuring it is functional and ready for flight.
How Do You Shape Thermocol For A Plane?
To shape thermocol, use a sharp cutter or hot wire. Draw the plane’s design on the thermocol first. Carefully cut along the lines to shape the wings and fuselage. Smooth any rough edges with sandpaper for a polished finish.
Can A Beginner Make An RC plane?
Yes, beginners can make an RC plane with patience. Start with a simple design and follow detailed instructions. Use online tutorials and guides to understand the process. Ensure you have the right materials and tools to make the assembly easier.
How Long Does It Take To Build An RC Plane?
Building an RC plane can take a few days. The time varies based on design complexity and your experience level. Allocate time for cutting, assembling, and testing. For beginners, it’s essential to work methodically and not rush the process.
Conclusion
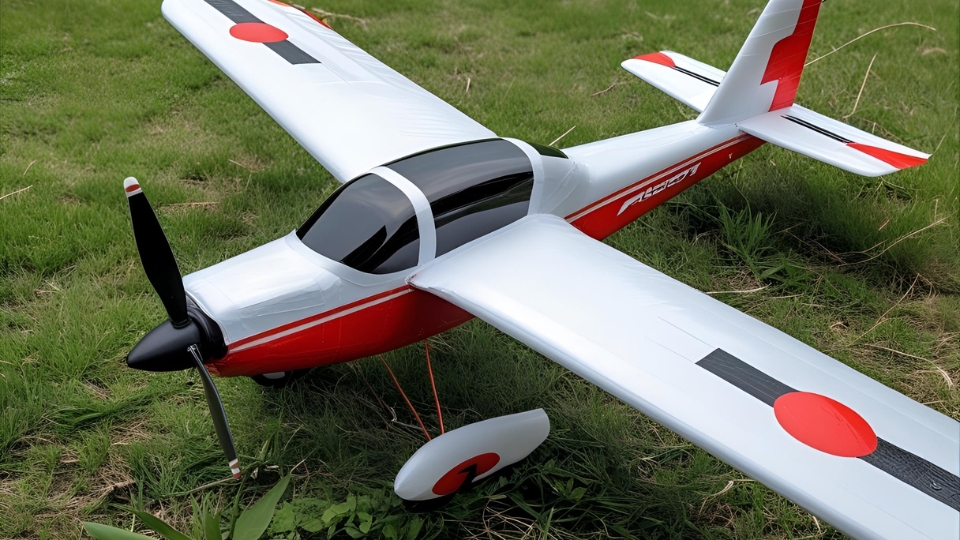
Building an RC plane with thermocol is fun and rewarding. Start by gathering all necessary materials. Follow the steps carefully to shape and assemble your aircraft. Paint it to your liking for a personal touch. Test it in an open area to see it fly.
Mistakes may happen, but practice makes perfect. Enjoy watching your creation soar. This project enhances creativity and technical skills. Share your experiences with friends and family. Inspire others to try this enjoyable hobby. Happy flying!