How Do I Calculate How Much Fabric I Need for Piping: Expert Tips
Are you planning to add a touch of elegance to your sewing project with piping, but find yourself stuck on figuring out how much fabric you’ll need? You’re not alone!
Many passionate creators like you face the same challenge. The good news is, once you get the hang of it, calculating fabric for piping becomes second nature. Imagine having the perfect amount of fabric, without the stress of last-minute shortages or excess waste.
This article is here to guide you step-by-step through the process, ensuring you have everything you need to create stunning, professional-looking piping for your projects. Dive in, and let’s transform your sewing experience from frustrating guesswork to confident precision!
Credit: www.sailrite.com
Fabric Selection For Piping
To calculate fabric for piping, measure the length of the edges you want to cover. Add extra for seams and corners. Multiply this total by the width of the piping fabric strip. This gives you the amount needed.
Choosing the right fabric for piping can be a game-changer in your sewing project. Whether you’re adding flair to a cushion or a garment, the fabric you choose for piping can enhance both the aesthetics and functionality.
Let’s dive into the essentials of fabric selection for piping to make your projects not only beautiful but also long-lasting.
Choosing The Right Type
Selecting the right type of fabric is key to achieving the desired look and feel. Cotton is a popular choice due to its versatility and ease of handling. However, if you’re looking for something more luxurious, consider silk or velvet.
Keep in mind the fabric’s interaction with the main material. If you’re working with a stretchy fabric, a non-stretchy piping might not blend well. Experiment with small fabric swatches to see how they pair.
Understanding Fabric Weight
Fabric weight can significantly affect how your piping sits and feels. Lightweight fabrics like chiffon can create a delicate finish, but they may not hold up well in high-use areas. Heavier fabrics, such as denim or canvas, provide durability and a more pronounced piping effect. Consider the end use of your project.
For a sofa cushion, a medium to heavyweight fabric will be more suitable. For a dress, lighter fabrics might add the perfect touch of elegance.
Durability And Maintenance
Durability is crucial, especially for items that will endure frequent use. Fabrics like polyester blends offer robust durability without compromising on style. They’re also easier to maintain, often being machine washable.
Think about how much time you’re willing to invest in maintenance. If you have a busy schedule, choosing a fabric that requires minimal upkeep will save you headaches down the road.
Finally, ask yourself: How often will this item be used, and how much wear and tear will it experience? Answering these questions will guide you in selecting the most suitable fabric for your piping needs.
Measuring For Piping
Creating beautiful piping for your sewing project can add a perfect touch of professionalism and polish. However, knowing how much fabric you need for piping is crucial to avoid unnecessary waste or last-minute trips to the fabric store.
Measuring for piping might seem daunting, but with some simple calculations, you’ll be well on your way to a perfectly finished project.
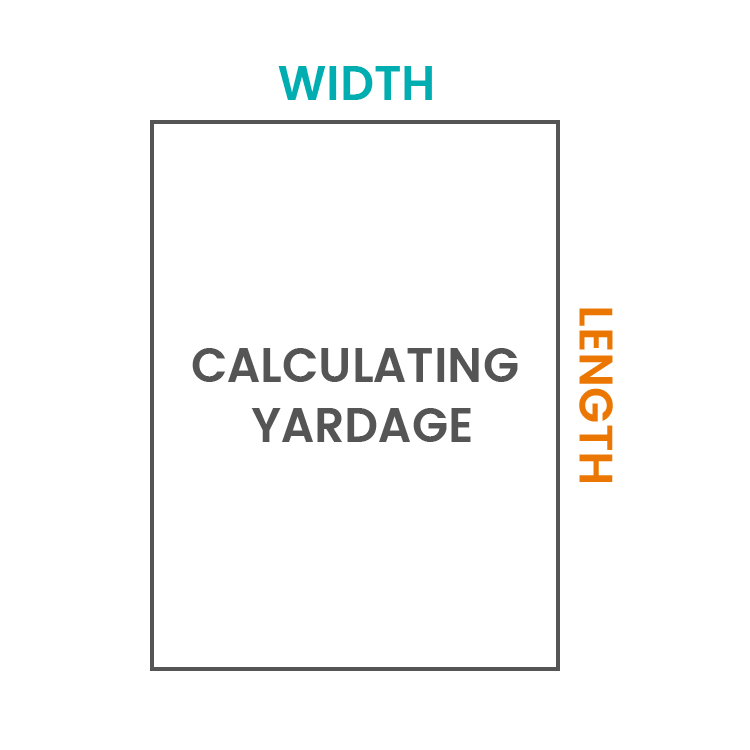
Calculating The Length
Start by determining the total length of piping required for your project. Measure along the edges where you plan to place the piping. If you’re working on a pillow, measure all four sides.
Don’t forget to add a little extra to your total measurement. An additional 10% is usually a safe buffer for mistakes or adjustments. This ensures you won’t run short right at the end.
Determining Width Requirements
The width of the fabric strip for piping depends on the size of the cord you’re using. Typically, you need fabric strips wide enough to wrap around the cord and leave extra for seams.
For a 1/4 inch cord, a 1.5-inch wide strip is usually sufficient. Measure your cord and test wrap a strip to be sure you have the right width.
Considering Seam Allowances
Include seam allowances in your fabric calculations. A standard seam allowance is about 1/2 inch on each side of the cord.
This means your fabric strip should be wide enough to accommodate both the cord and these seam allowances. It can be frustrating to realize you’ve cut your fabric too narrow after you’ve already started sewing.
Calculating fabric for piping might seem like a small detail, but it’s these details that elevate your sewing project. Have you ever found yourself short on fabric because of overlooking seam allowances? Double-check your measurements and enjoy a smoother sewing experience.
Tools For Accurate Measurement
When embarking on a sewing project that involves piping, having the right tools for accurate measurement is crucial. Without precision, you might end up with too much or too little fabric, leading to wasted resources or a frustrating trip back to the store.
Let’s dive into the essential tools that will ensure your measurements are spot on, making your piping project a breeze.
Essential Measuring Tools
First on your list should be a sturdy measuring tape. It’s your best friend for any sewing project. A clear, flexible tape helps wrap around curves and corners easily.
Don’t overlook the value of a good pair of scissors for cutting tape precisely. Markers or fabric chalk are useful for noting measurements directly on the material. If you often work with patterns, a transparent ruler can be a game-changer, offering clarity and precision.
Using A Measuring Tape Effectively
Measuring tapes might seem straightforward, but there’s an art to using them effectively. Always start by ensuring your tape is flat against the fabric.
Avoid twisting or curling, as it can lead to inaccurate readings. It’s vital to start your measurements from the very edge of the fabric. This guarantees that every inch counts, especially in projects like piping, where precision is key.
Tips For Precise Measurements
Precision is all about attention to detail. Double-check your numbers. It might seem tedious, but catching a mistake early saves time and fabric. Consider creating a small table to keep track of measurements, especially if you’re working on larger projects.
You can use a simple notebook or a spreadsheet. Have you ever thought of measuring twice and cutting once? This age-old advice holds, ensuring that your project runs smoothly.
Accurate measurements transform your sewing experience, elevating your creations from amateur to professional. Armed with the right tools and techniques, you’ll be ready to tackle your next piping project with confidence. Are you prepared to make your next sewing adventure a success?
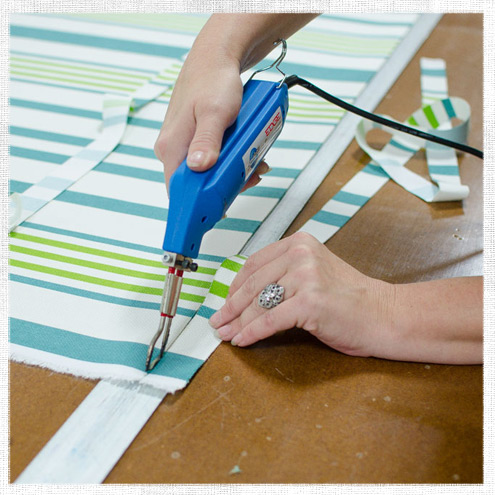
Credit: www.onlinefabricstore.com
Adjusting For Fabric Stretch
Calculate fabric needs for piping by considering stretch factors. Measure the fabric’s stretch percentage and adjust accordingly. This ensures accurate yardage and a snug fit for your piping projects.
When you’re planning a sewing project that involves piping, accounting for fabric stretch is crucial to ensure your project turns out just right. Fabric stretch can impact the amount of material you need. This is especially true if you’re working with stretchy or knit fabrics.
A little extra effort in planning can save you from surprises and trips to the fabric store.
Identifying Stretch Fabrics
Before you start measuring, it’s important to identify if your fabric has stretch. Stretch fabrics, like jersey or spandex, often have a give that can affect your project. To check, gently pull the fabric along its width and length. Does it bounce back to its original shape easily?
If so, you’re dealing with a stretch fabric. Recognizing this characteristic early can help you plan accurately.
Compensating For Elasticity
Once you’ve identified the stretch, the next step is to adjust your measurements to compensate for it. Stretch fabrics can shrink or expand when sewn, impacting your finished product. Add a little extra to your fabric calculations to allow for this elasticity.
As a rule of thumb, consider adding 10-15% more fabric to your original measurement. This small adjustment can make a big difference in the final appearance.
Testing Stretch Factor
Testing the stretch factor of your fabric can be a game-changer. Cut a small swatch of your fabric and sew a piece of piping into it. Observe how much the fabric stretches during this process. This hands-on test provides a clearer picture of how the fabric will behave.
Use this insight to fine-tune your fabric requirements. Wouldn’t it be better to know now rather than when you’re halfway through your project?
By focusing on these steps, you can ensure your fabric choices and measurements align perfectly, avoiding common pitfalls associated with stretch fabrics. Happy sewing!
Common Mistakes In Fabric Calculation
Misjudging fabric width and piping diameter often leads to errors. Measure piping length accurately, considering seam allowance. Calculate fabric strips needed by multiplying piping length by the strip width.
Calculating the right amount of fabric for piping can be a tricky endeavor. You might think you’ve got it all figured out, only to find yourself with either too much or too little material.
Understanding common mistakes can save you both time and money.
Overestimating Vs Underestimating
It’s tempting to play it safe by overestimating fabric needs. You think a little extra won’t hurt, but those extra inches add up. This leads to unnecessary expenses and wasted materials. Underestimating is equally problematic.
Running out of fabric mid-project can be frustrating. It disrupts your workflow and may result in mismatched dye lots if you need to purchase more. Consider measuring twice before making your purchase. This simple step can help you strike a balance.
Ignoring Fabric Patterns
Patterns on fabric can significantly affect how much you need. Overlooking pattern repeats might lead to disappointing results. Imagine misaligned designs on your beautifully sewn project. Plan for pattern repeats in your fabric calculation.
Failing to do so can result in a less-than-perfect finished product. This is especially critical for bold or large prints. Take a moment to visualize how the pattern will align on your final piece. It’s a small step, but it makes a big difference.
Neglecting Shrinkage Factors
Fabric shrinkage is often an afterthought, but it shouldn’t be. A fabric that shrinks after the first wash can throw off your measurements. You’re left with a piece that’s too tight or too short. Always check the fabric care instructions.
Pre-washing your fabric can mitigate shrinkage issues. This step ensures your final project looks as good after the wash as it did when you first made it. Have you ever skipped this step and faced the consequences? It’s a lesson worth learning from.
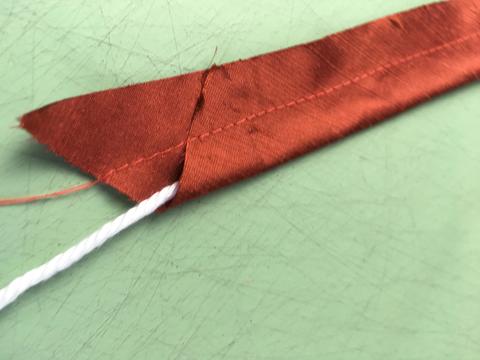
Credit: www.folkwear.com
Expert Tips For Efficient Fabric Use
Calculating fabric for piping involves measuring the length of the area to be piped. Add extra inches for seams. Divide the total by the fabric width to determine the number of strips needed. This ensures you have enough fabric without wastage.
Calculating the right amount of fabric for piping can be a daunting task, but with some expert tips, you can make the most of your fabric. Efficient fabric use not only saves money but also minimizes waste, making your projects more sustainable.
Maximizing Fabric Yield
To get the most out of your fabric, start by measuring your project accurately. A common mistake is estimating too broadly, which can lead to excess or insufficient fabric.
Consider the width of the fabric bolt. If you’re using a 45-inch wide fabric, calculate how many strips you can cut from the width. For instance, if you need 2-inch-wide strips, you can get about 22 strips from the width alone.
Strategic Cutting Techniques
Cutting fabric strategically can make a significant difference. Always cut on the bias for piping, as this provides flexibility and a smooth finish.
Use a rotary cutter and a clear ruler to ensure precision. This reduces mistakes and allows you to cut multiple layers at once, saving time and fabric. Before cutting, lay your fabric flat and smooth out any wrinkles. This ensures accurate cuts and prevents fabric wastage.
Using Fabric Remnants Wisely
Don’t let small fabric pieces go to waste. Those remnants can be perfect for smaller projects or additional piping on future projects. Organize your remnants by size and color.
This makes it easier to find the right piece when inspiration strikes. Think creatively about how to use these small pieces. You could make patchwork projects or even use them to add decorative touches to existing items. What clever ways have you found to use leftover fabric?
By following these expert tips, you can ensure that every inch of your fabric is put to good use, making your projects not only cost-effective but also environmentally friendly.
Resources For Further Assistance
Calculating the fabric needed for piping can seem confusing. Luckily, there are many resources available to help. From online tools to sewing communities, you can find the guidance you need. Let’s explore some of these helpful resources.
Consulting Fabric Guides
Fabric guides are essential for any sewing project. They offer detailed instructions and measurements. These guides can help determine the amount of fabric required for piping.
Many fabric stores provide these guides for free. Check their websites or ask in-store for a copy. These guides often include tips and tricks for efficient fabric use.
Using Online Calculators
Online calculators simplify fabric calculations. These tools require a few inputs, like piping length and fabric width. They quickly provide the required fabric amount. Many sewing and craft websites offer these calculators.
Simply enter your project details and get instant results. This method saves time and reduces errors.
Joining Sewing Communities
Sewing communities are great for sharing knowledge. Join forums or social media groups focused on sewing. Members often share advice and experiences with fabric calculations.
Engaging with these communities can provide valuable insights. Many members are happy to help with specific questions. This support network can boost your confidence in sewing projects.
Frequently Asked Questions
What Is Piping In Sewing Projects?
Piping is a decorative trim used in sewing, typically made by wrapping fabric around a cord. It adds a tailored finish to garments, cushions, and upholstery. The piping is often inserted into seams to enhance the overall aesthetic and structure of the project.
How Do I Measure Fabric For Piping?
To measure fabric for piping, first determine the length needed. Measure the seam length where piping will be inserted. Add seam allowances. Consider the width of the fabric strip required to wrap around the cord, usually 1. 5 to 2 inches wide, depending on the cord’s thickness.
What Factors Affect Fabric Quantity For Piping?
Several factors influence the fabric quantity for piping. These include the length of the seam, the thickness of the cord, and the desired seam allowance. Also consider the fabric width. These elements determine how much fabric you’ll need to create the piping for your project.
Can I Use Any Fabric For Piping?
Yes, most fabrics can be used for piping. However, choose a fabric that complements your project. Lightweight fabrics work well for clothing, while heavier materials are suitable for upholstery. Ensure the fabric is durable enough to withstand the wear and tear of the project.
Conclusion
Calculating fabric for piping need not be difficult. Start by measuring your project. Add a little extra for seams and mistakes. Accuracy ensures you buy the right amount. This saves money and time. Use a simple formula: length of piping plus seam allowance.
Always double-check your measurements. Consider fabric width and pattern direction too. Practice makes it easier over time. With these steps, you can confidently choose the right fabric amount. Happy sewing!