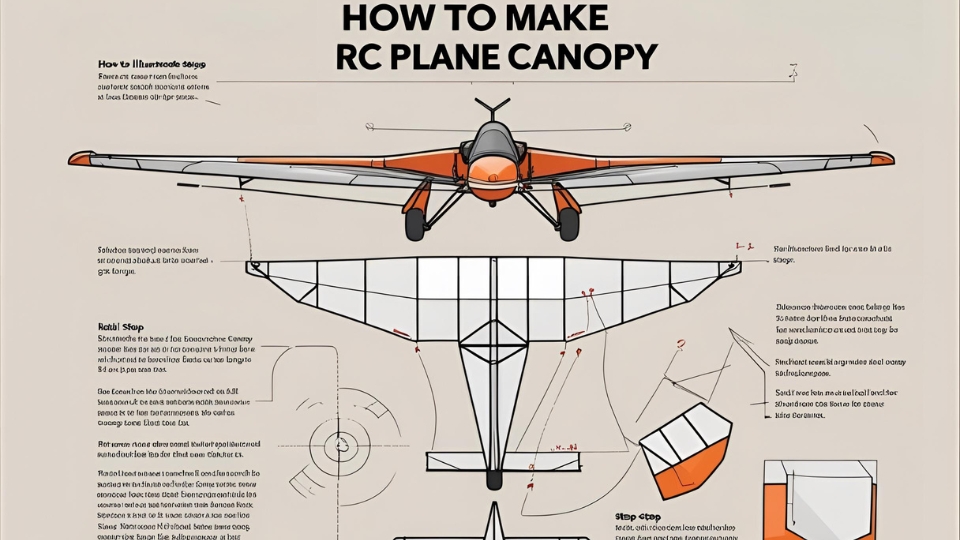
How to Make Rc Plane Canopy: Step-by-Step Guide 2025
Imagine soaring through the sky with your own RC plane, feeling the thrill and pride of watching your creation in flight. But to truly personalize your aircraft, you need a standout feature: the canopy.
You might wonder how to make an RC plane canopy that not only enhances your plane’s aesthetics but also boosts its performance. The answer is more straightforward than you think, and this guide is here to walk you through every step.
You’ll discover techniques that are easy to follow, ensuring your canopy is both functional and stylish. Ready to elevate your RC plane experience? Dive into this article to find out how you can craft a canopy that turns heads and transforms your flying adventures.
How to Make RC Plane Canopy: Materials Needed
Creating an RC plane canopy requires the right materials. It’s a critical part of the plane’s structure. A well-made canopy enhances the model’s appearance. It also protects the plane’s interior components. Selecting suitable materials is essential for this task.
Plastic Sheets
Plastic sheets form the canopy’s main body. They are lightweight and flexible. Most enthusiasts use PETG or polycarbonate sheets. These materials are durable and easy to mold. Choose sheets with a thickness of 0.5 to 1 mm. Thin sheets are easy to shape and cut.
Heat Gun
A heat gun helps in shaping the plastic. It softens the material without burning it. This tool is crucial for precise molding. Adjust the heat level to avoid damage. Keep a safe distance between the gun and the plastic.
Molding Frame
The molding frame holds the plastic in shape. It provides a template for the canopy’s design. Use a wooden or metal frame for stability. Ensure it matches your plane’s design. This frame guides the plastic as it cools.
Scissors Or Hobby Knife
Cutting tools are essential for trimming excess plastic. Scissors or a hobby knife work best. They help achieve a clean, precise edge. Ensure the tools are sharp. This reduces the risk of jagged cuts.
Sandpaper
Sandpaper smooths the rough edges of the canopy. It prepares the plastic for painting. Use fine-grit sandpaper for the best results. This ensures a polished finish on your canopy.
Paint And Brushes
Paint adds detail to the canopy. Acrylic paint is a popular choice. It adheres well to plastic surfaces. Use brushes for fine detailing. Choose colors that match your plane’s design.

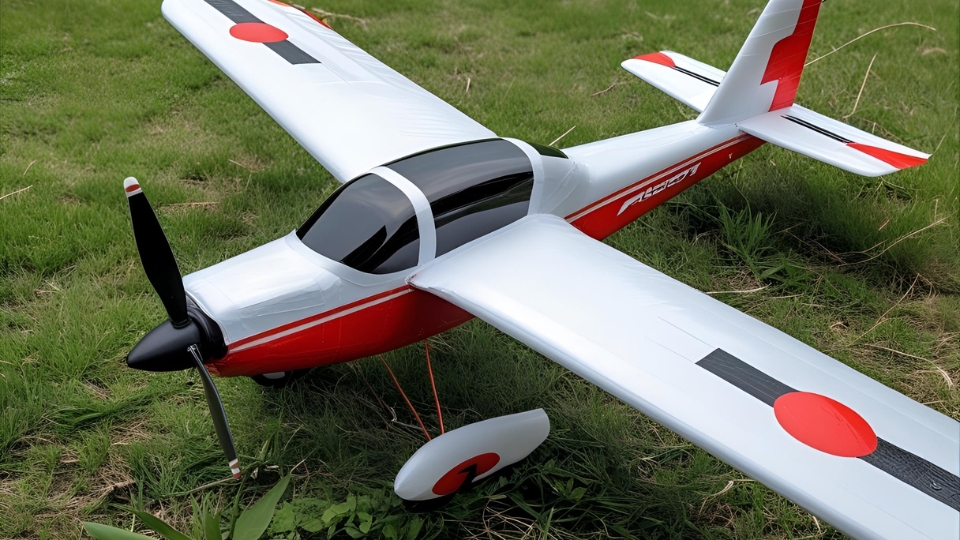
Credit: www.flitetest.com
Designing The Canopy
Crafting an RC plane canopy involves using lightweight materials like plastic or fiberglass. Begin by sketching the design, ensuring aerodynamic efficiency. Carefully mold the chosen material, maintaining a snug fit on the plane’s body for optimal performance.
Designing the canopy for your RC plane is not just about aesthetics; it’s a crucial element that affects aerodynamics and overall flight performance.
A well-designed canopy can enhance your plane’s look while ensuring it slices through the air efficiently. When I first started building RC planes, I underestimated the impact of a well-crafted canopy. But after tweaking and experimenting, I realized its significance in achieving optimal flight balance.
Understanding Canopy Shapes
The shape of your canopy can influence the plane’s speed and stability. A sleek, aerodynamic design is often preferred for racing planes, while a more rounded shape might be suitable for gliders. Consider what you want your aircraft to achieve and design your canopy accordingly.
Choosing The Right Materials
Selecting materials for your canopy is crucial. Lightweight plastics, like PETG, are popular because they are easy to mold and durable. However, you might also experiment with balsa wood for a more traditional look. Think about the trade-offs between weight and durability when making your choice.
Incorporating Visibility Features
Visibility is key, especially if you plan to fly your RC plane at a distance. You might want to add a transparent section in your canopy design. This can be achieved with clear plastic or by painting only part of the canopy.
How will you ensure the pilot’s view remains unobstructed?
Creating A Mock-up
Before committing to your final design, create a mock-up using cardboard or foam. This step allows you to test the fit and appearance without risking your materials. Does the mock-up align with your vision? Adjust as necessary before cutting into more expensive materials.
Testing And Refining
Imagine soaring through the sky with your own RC plane, feeling the thrill and pleasure. Observe how it affects the plane’s performance and make necessary adjustments. Did the design meet your expectations in flight?
Learning from these tests will only improve your future designs. Engage with your creation process, and remember, the canopy is more than just a cover; it’s a functional part of your RC plane’s flight dynamics.
Choosing The Right Foam
Creating an RC plane canopy requires choosing the right foam. Foam is essential for shaping and durability. It impacts the canopy’s appearance and performance. Selecting the correct foam ensures your canopy is lightweight yet sturdy. Understanding foam types helps in making informed decisions.
Types Of Foam Available
Several foam types are suitable for RC plane canopies. EPP foam is known for its flexibility and resilience. It absorbs impact well, making it ideal for beginners.
Another option is Styrofoam, which is lightweight and easy to carve. It suits more intricate designs. Depron foam is also popular for its smooth finish and rigidity. Each type has unique properties.
Factors To Consider
Consider the weight of the foam. Lightweight foam enhances flight performance. Durability is another factor. Choose foam that withstands impacts. Flexibility matters too. Flexible foam is easier to shape. Think about the finish you want. Smooth finishes look professional.
Environmental Impact
Foam choice affects the environment. Some foams are eco-friendly. EPP foam is recyclable. It reduces waste. Styrofoam is less environmentally friendly. Consider biodegradable options. Choose foam with minimal environmental impact.
Cost And Availability
Foam costs vary. EPP foam is affordable and widely available. Styrofoam is cheaper but less durable. Depron foam is pricier, offering higher quality. Check local stores or online for foam availability. Balance cost with quality and durability.
Cutting The Foam
Crafting an RC plane canopy involves precisely cutting foam to shape the desired contour. This process requires careful measurements and steady hands to achieve a smooth, aerodynamic finish. Proper tools ensure clean cuts, resulting in a sleek and functional canopy for your model plane.
Creating a canopy for your RC plane can be an exciting part of the build process. It not only adds an aesthetic appeal but also enhances the aerodynamics of your model.
Cutting the foam is a critical step in this process. It requires precision and patience, but with the right approach, you can achieve a professional finish that will make your RC plane stand out in the sky.
Understanding The Foam Material
Foam is a popular choice for RC plane canopies due to its lightweight nature and ease of handling. It’s crucial to select a foam that balances flexibility and durability. Extruded polystyrene is often recommended for its smooth surface and resistance to moisture.
Preparing Your Tools
Before diving into cutting, ensure you have the right tools at hand. A sharp hobby knife or a hot wire cutter works wonders for clean edges. Keep a cutting mat to protect your surfaces and maintain precision. If you’re unsure about these tools, try practicing on a small piece of foam first.
Marking Your Design
Using a pencil, outline the design on the foam. This is your roadmap. Keep the lines clear and accurate. You’ll want to avoid any confusion during cutting. Think about how the canopy will fit on your RC plane and make adjustments if necessary.
Executing The Cut
Start slow and follow the lines you’ve marked. Use steady pressure to avoid jagged edges. If you’re using a hot wire cutter, let the heat do the work. Avoid forcing the tool through the foam. Remember, patience is key. If you’re rushing, you might end up with uneven cuts.
Safety Measures
Protect yourself while cutting. Wear a mask to avoid inhaling foam particles. Make sure your workspace is well-ventilated. A slight mistake can lead to discomfort, so take care. Safety goggles can prevent foam bits from entering your eyes.
Checking For Precision
Once cut, examine the edges for smoothness. Use sandpaper for minor adjustments. A well-finished edge can dramatically enhance the canopy’s final look. This step might seem tedious, but it pays off in the end.
Reflecting on my first RC plane canopy, I remember the thrill of seeing it come together. The precision in cutting the foam made all the difference. What about you? Have you considered how the quality of your cuts could elevate your project?
Shaping The Canopy
Crafting an RC plane canopy involves selecting the right materials and tools. Begin by cutting the plastic sheet to shape, then gently mold it using heat. Secure the canopy to the plane’s frame for stability and aerodynamics.
Creating an RC plane canopy can be a rewarding part of your model-building journey. It offers a chance to express creativity while ensuring functionality. Shaping the canopy is a crucial step that can make or break the aesthetic and aerodynamic qualities of your RC plane.
Let’s dive into some practical steps to shape your canopy effectively.
Gathering The Right Materials
Begin by selecting the right materials for your canopy. Transparent plastic sheets are a popular choice because they are easy to mold and lightweight. Visit your local hobby shop or browse online for sheets like PETG or polycarbonate. Having the right tools is equally important.
A heat gun, sharp scissors, and a mold are essential for this task. If you don’t have a mold, a simple DIY method using clay or even a cardboard cutout can work wonders. Creating a mold is the foundation of shaping your canopy. Think about the design you envision. Is it sleek and streamlined, or does it have a vintage vibe?
Use clay or foam blocks to carve out the shape of your canopy. Ensure the mold is slightly larger than the final canopy size to allow for trimming. This step can take some trial and error, so be patient and refine your shape as needed.
Heating And Shaping
Heating the plastic sheet is where the magic happens. But it requires precision. Use a heat gun to carefully warm the sheet, holding it at an appropriate distance to avoid melting or burning the material. Once the plastic is pliable, quickly lay it over your mold.
Use your hands (wearing gloves for protection) or a soft cloth to press the plastic into the mold’s shape. The key is to work swiftly yet gently to achieve a smooth finish.
Trimming And Finishing Touches
After the plastic has cooled and set, it’s time to trim the excess material. Use sharp scissors or a hobby knife for clean cuts. Be meticulous in this step to ensure the canopy fits perfectly onto your RC plane.
Consider adding a frame or painting the edges for an enhanced look. A simple touch of color can transform your canopy from basic to brilliant.
Testing The Fit
Before securing your canopy onto the plane, test the fit. Does it align well with the fuselage? Is the visibility clear from the cockpit area? This is the moment to make any necessary adjustments. A little tweak here and there can lead to a perfect fit and an overall impressive appearance.
How does your new canopy affect the plane’s aerodynamics? It’s worth testing a few flights to see if any modifications are needed. Keep iterating until you achieve the desired performance and look.
Embrace the learning process and enjoy the creative freedom that comes with shaping your RC plane canopy. What unique design will you craft next?

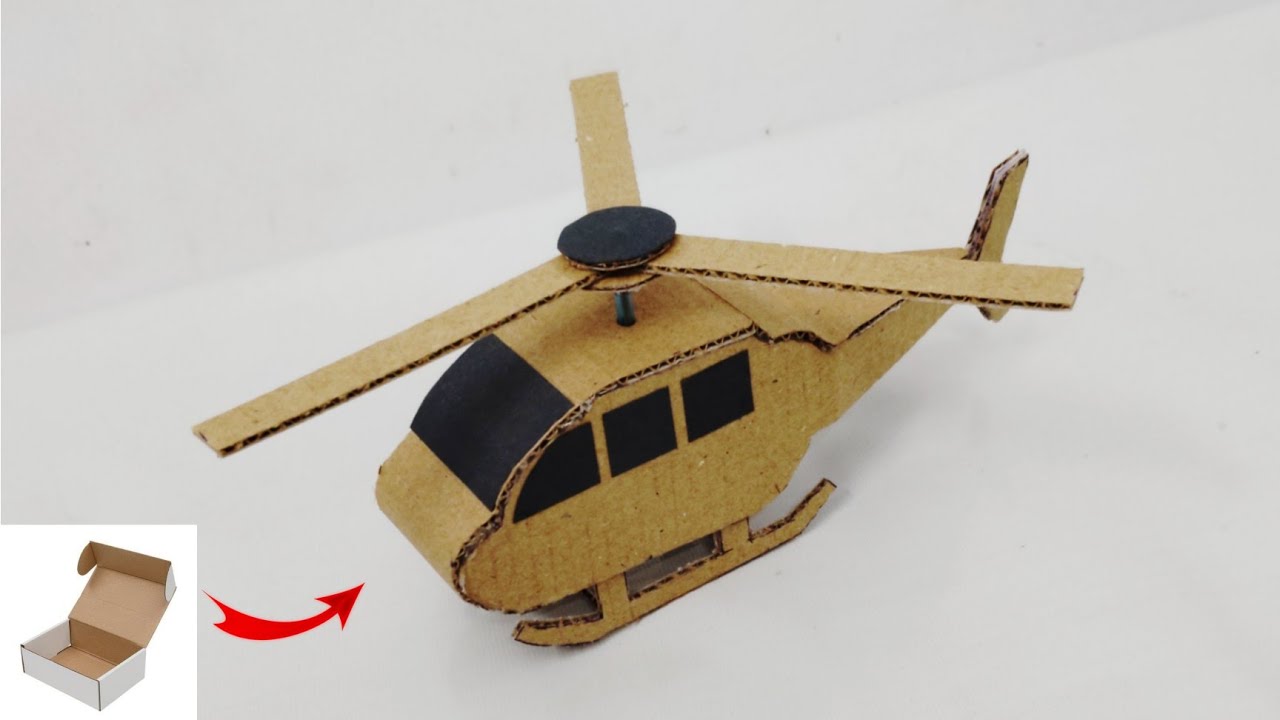
Credit: www.flitetest.com
Creating A Mold
Crafting an RC plane canopy involves creating a mold using materials like foam or wood. Shape the mold carefully to match the desired canopy design. Then, use vacuum forming techniques to shape plastic over the mold, resulting in a smooth and precise canopy for your RC plane.
Creating a mold for your RC plane canopy is a crucial step that requires patience and precision. This process involves shaping the material into a form that closely mimics the final canopy design.
It’s the foundation for a perfect fit and smooth finish on your RC plane. Understanding the basics of mold-making can significantly improve the quality of your canopy.
Here’s how you can get started:
Gathering Materials
Start by collecting all necessary materials. You’ll need modeling clay, a wooden base, and some sandpaper. Having everything ready before you begin will save you time and stress. You won’t have to stop mid-process to find something you forgot.
Shaping The Clay
Use the modeling clay to shape the initial form of your canopy. Make sure the dimensions match your plane’s specifications. This step is crucial, as any errors here will carry over to the final product.
Smoothing The Surface
Once the basic shape is ready, smooth the clay surface with sandpaper. A smooth surface ensures that your canopy will be free of blemishes. Remember, attention to detail here will pay off later.
Creating The Frame
Build a frame around your clay mold using wood. This frame will help maintain the shape and integrity of the mold. It’s like giving your mold a sturdy backbone.
Applying Release Agent
Coat the clay mold with a release agent to prevent sticking. A simple spray or brush-on agent will do the trick. This step is essential for easy removal once the mold is set.
Pouring The Plaster
Pour plaster into the frame, covering the clay mold. Let it set and harden completely. This plaster cast will serve as the negative of your canopy.
Removing The Mold
Carefully remove the wooden frame and clay from the hardened plaster. You now have a sturdy mold ready for canopy production. Feel a sense of achievement as you hold the fruit of your labor. Creating a mold might seem like a daunting task, but with careful attention to detail, it becomes manageable.
Have you considered how the quality of your mold impacts the final canopy? Your patience and dedication here set the stage for a successful RC plane canopy project.
Vacuum Forming Process
Creating an RC plane canopy using the vacuum forming process is fascinating. This method allows you to mold plastic into a desired shape. It’s a crucial step in making a realistic plane model. The process is simple yet requires precision. Let’s dive into the details of this technique.
Understanding Vacuum Forming
Vacuum forming involves heating a plastic sheet. Once it’s soft, you place it over a mold. A vacuum then pulls the plastic tight around the mold. This creates the canopy’s shape. This method is widely used due to its simplicity and effectiveness.
You need a few basic materials. A vacuum forming machine is essential. You also need a mold of the canopy shape. Plastic sheets, usually PETG, work best. Lastly, have a heat source ready. A simple oven can suffice.
Steps To Form The Canopy
Start by heating the plastic sheet. It should become pliable but not too soft. Place the sheet over your mold. Turn on the vacuum to remove air. This will pull the plastic tight against the mold. Let it cool before removing the mold.
Tips For Success
Ensure the plastic heats evenly. Uneven heating can cause warping. Use a well-shaped mold for best results. Keep safety in mind. Wear gloves to protect against burns. Practice makes perfect in vacuum forming.
Trimming And Finishing
Trimming and finishing your RC plane canopy gives it a polished look. This step ensures the canopy fits perfectly and looks professional. Careful trimming prevents any issues during attachment or flight.
Trimming The Canopy
Use sharp scissors for precise cuts. Hold the canopy steady on a flat surface. Trim slowly along the marked lines. Cut small sections at a time to avoid mistakes. Check your progress frequently.
Sanding The Edges
Smooth edges are crucial for a neat finish. Use fine-grit sandpaper for sanding. Gently rub the edges in a circular motion. Avoid sanding too much. This prevents the canopy from becoming too thin.
Applying A Protective Coating
A protective coating adds durability. Use a clear spray sealant for best results. Apply thin, even layers. Allow each layer to dry before applying the next. This prevents drips and uneven surfaces.
Inspecting The Fit
Place the canopy on the plane to check the fit. Ensure it aligns with the fuselage. Adjust trimming if necessary. A snug fit enhances the plane’s aerodynamics.
Final Touches
Clean the canopy with a soft cloth. Remove any dust or fingerprints. This ensures a clear view through the canopy. Double-check all edges and coatings before final attachment.
Attaching To The Plane
Creating an RC plane canopy involves careful selection of lightweight materials like plastic sheets. Cut and shape them to fit the plane’s cockpit. Secure the canopy using glue or small screws for a snug fit.
Attaching the canopy to your RC plane is a crucial step that ensures your creation is both functional and aesthetically pleasing. This stage of the build can be a bit challenging, but it’s also gratifying.
Once you see your plane with its canopy securely in place, you’ll feel a sense of accomplishment that makes every minute spent worthwhile.
Gather Your Tools
Before you begin, make sure you have all the necessary tools at hand. You’ll need some basic items like a screwdriver, glue, and perhaps some screws or bolts, depending on your design. Having everything ready saves time and reduces frustration.
Align The Canopy
Place the canopy over the cockpit area to see how it fits. Check if it aligns perfectly with the plane’s structure. Adjust as needed to ensure a snug fit.
Mark Attachment Points
Once aligned, use a pencil to mark where you’ll attach the canopy. These marks act as guides, ensuring that the canopy sits correctly when secured. Don’t skip this step—precision is key.
Secure With Adhesive
Using a strong adhesive, apply a thin layer to the marked areas. Press the canopy firmly onto the plane and hold for a few minutes. Check to ensure there are no gaps.
Reinforce With Screws
If your design allows, use small screws to secure the canopy further. This adds an extra layer of stability and makes sure the canopy stays in place during flight. Be careful not to overtighten and crack the canopy.
Test The Attachment
Once everything is in place, gently shake the plane to test the canopy’s attachment. If it feels loose, consider adding more adhesive or additional screws. It’s better to discover any issues now than during a flight.
Reflect On Your Work
Take a moment to admire your work. Attaching a canopy isn’t just about functionality; it’s about crafting something you’re proud of. Doesn’t it feel great to see your plane coming together?
Plan Your Next Flight
With the canopy securely attached, you’re one step closer to taking your RC plane for a spin. Think about where you’ll fly it next. Imagine the joy of seeing it soar through the sky with a canopy you crafted yourself.
Attaching the canopy is more than just a task—it’s a step toward completing your project and taking flight. What other improvements will you make to enhance your RC plane?

Credit: www.youtube.com
Frequently Asked Questions
What Materials Are Best For RC Plane Canopies?
The best materials for RC plane canopies include clear plastic or acrylic sheets. These materials are lightweight and durable. They provide excellent visibility and protection. You can easily shape them using heat. Make sure to choose a material that fits your model’s specifications.
How Do You Shape An RC Plane Canopy?
To shape an RC plane canopy, use a heat source like a heat gun. Apply heat evenly to soften the material. Then, mold it over a form or frame. Ensure it cools in the desired shape. Take care to avoid overheating, which can cause warping.
Can You Paint An RC Plane Canopy?
Yes, you can paint an RC plane canopy using suitable paints. Choose paints designed for plastics to ensure adhesion. Clean the canopy surface before painting. Apply thin, even coats for a smooth finish. Allow each coat to dry thoroughly to prevent smudging.
How to Attach a Canopy to RC Plane Securely?
Attach the canopy using screws, clips, or adhesives. Ensure secure attachment to prevent it from coming off during flight. Check compatibility with your RC plane model. Double-check alignment and fit for aerodynamic efficiency. Regularly inspect the attachment points for wear and tear.
Conclusion
Creating an RC plane canopy can be a fun project. With simple tools and materials, you build something special. Following these steps ensures a neat, functional canopy. Remember to measure carefully—trim edges for a smooth finish. Paint or decorate for a personal touch.
Enjoy the satisfaction of building. Your RC plane will look fantastic. Practice makes perfect in crafting. Keep experimenting and learning new techniques. Share your creations with friends. Inspire others to try building too. Fly your RC plane proudly with its new canopy.
Happy flying and safe landings!