How to Repair Styrofoam Rc Plane Kit: Expert Tips 2025

You’ve invested time and passion into your Styrofoam RC plane kit. Watching it soar through the sky brings a thrill that never gets old.
But what happens when your trusty flyer encounters damage? Panic might set in, but don’t worry—repairing your RC plane is easier than you think. This guide will show you step-by-step how to bring your aircraft back to life, ensuring you spend more time flying and less time fretting.
Imagine the satisfaction of fixing it yourself and the joy of seeing it glide smoothly again. You have the power to make repairs quickly and efficiently, and we’re here to help you every step of the way. Please keep reading to discover the secrets of restoring your RC plane to its former glory!
Credit: www.youtube.com
How to Repair Styrofoam RC Plane Kit: Essential Tools
Repairing a Styrofoam RC plane kit requires essential tools like glue, sandpaper, and a hobby knife. These tools help fix cracks, smooth surfaces, and trim excess material. Proper use ensures your RC plane flies smoothly again.
Repairing a Styrofoam RC plane kit requires the right tools. Using the correct equipment ensures your repair is effective and long-lasting. Having these tools on hand makes fixing your plane easier and quicker. Let’s explore the essential tools you need for this task.
Glue
Specialized glue is crucial for repairing Styrofoam. Foam-safe CA glue works best. It bonds the material without causing damage. Ensure the glue dries clear for a neat finish.
Sandpaper
Sandpaper smooths any rough edges. It helps create a clean surface for gluing. Use fine-grit sandpaper for delicate areas. This prevents further damage to the Styrofoam.
Hobby Knife
A sharp hobby knife is essential. It helps in cutting precise shapes. Use it to remove damaged sections neatly. Always handle with care to avoid injury.
Paintbrush
A small paintbrush helps apply glue. It ensures an even spread over the surface. Choose a brush with soft bristles. This prevents the Styrofoam from tearing.
Masking Tape
Masking tape holds pieces in place while the glue dries. It maintains the structure of your plane. Use it to align parts accurately. This ensures a seamless repair.
Measuring Tape
Accurate measurements are vital. A measuring tape helps in cutting the correct sizes. It ensures parts fit perfectly. This minimizes errors during repair. By equipping yourself with these tools, you’re set for a successful repair. Each tool plays a critical role. Proper use ensures your Styrofoam RC plane kit flies again smoothly.
Choosing The Right Adhesive
Repairing a Styrofoam RC plane kit involves choosing the right adhesive. The adhesive determines the strength and durability of your repair. Using the wrong glue can damage the foam and weaken the structure. Understanding different types of adhesives helps in making the right choice.
Understanding Foam-safe Adhesives
Foam-safe adhesives are a must for Styrofoam. These adhesives do not cause melting or distortion. They maintain the integrity of the foam. Look for labels that indicate “foam-safe” or “foam-friendly”. Such adhesives are often water-based or specially formulated.
Types Of Adhesives For Styrofoam
Several types of adhesives work well with Styrofoam. Cyanoacrylate (CA) glue is a standard and effective adhesive. It bonds quickly and is easy to use. Epoxy adhesives offer strong bonds and fill gaps. They are suitable for larger repairs. Always check if they are foam-safe.
Choosing Between Liquid And Gel Adhesives
Liquid adhesives are suitable for tight joints. They spread easily and cover more area. Gel adhesives are thicker and provide more control. They are ideal for vertical surfaces. Choose based on the repair type and surface orientation.
Testing Adhesive Compatibility
Test the adhesive on a small foam piece first. Observe any reactions like melting or warping. This ensures compatibility before applying to the plane. A small test saves time and prevents further damage.
Application Techniques For Best Results
Clean the surface of the Styrofoam before applying adhesive. Remove dust and debris for a strong bond. Apply a thin, even layer of glue. Press the pieces together firmly. Allow sufficient drying time as per product instructions.
Cleaning The Damaged Area
Gently remove debris from the damaged area to ensure a clean surface. Use a soft brush or cloth. This step prepares the styrofoam for effective repair.
Cleaning the damaged area is a crucial step in repairing your Styrofoam RC plane kit. A clean surface ensures that adhesives bond effectively, restoring your plane to optimal condition. Neglecting this step can lead to weak repairs, causing more damage in the future.
Let’s dive into how you can clean the damaged area effectively and set the stage for a successful repair.
Gather Your Cleaning Supplies
Before you start cleaning, make sure you have the right supplies. You’ll need a soft cloth, mild detergent, and water. Avoid harsh chemicals as they can damage the Styrofoam. A small brush can help reach tight spots.
Remove Debris And Dust
Begin by gently removing any loose debris or dust from the damaged area. Use a soft cloth to wipe the surface without applying too much pressure. This prevents further damage. If needed, a small brush can help dislodge stubborn particles.
Apply Mild Detergent Solution
Mix a few drops of mild detergent with water to create a gentle cleaning solution. Dampen your cloth with this mixture. Carefully wipe the affected area, ensuring that you cover all corners. This helps remove any grease or residue that could weaken the adhesive.
Dry Thoroughly
After cleaning, it’s essential to dry the area thoroughly. Use a dry cloth to pat the surface gently. Avoid using heat sources, such as Styrofoam, which can melt. Allow the area to air dry to ensure no moisture remains, which can affect the repair process.
Inspect For Remaining Damage
Once dry, inspect the area for any remaining damage. Are there cracks or indentations you missed? Ensuring the area is clean and smooth prepares it for the next repair steps. This inspection helps identify if more cleaning is needed. Have you ever skipped cleaning a damaged area and faced poor repairs?
Ensuring a clean surface isn’t just a tedious task; it’s the foundation of your plane’s recovery. Take these steps seriously, and your Styrofoam RC plane kit will thank you with a seamless flight.
Repairing Cracks And Breaks
Fixing cracks in a Styrofoam RC plane kit involves using foam-safe glue for a smooth repair. Apply gently along the damaged areas, ensuring even coverage. Let it dry thoroughly to restore strength and performance.
Repairing cracks and breaks in your Styrofoam RC plane kit doesn’t have to be daunting. With a few simple techniques and the right materials, you can restore your plane to its former glory.
Whether you’re a seasoned hobbyist or a newcomer, understanding how to fix these common issues will keep your plane soaring in the skies and provide you with a rewarding hands-on experience.
Understanding The Damage
Before you begin, assess the extent of the damage. Is it a small crack or a complete break? Knowing this helps you determine the proper repair method. Use a gentle touch to avoid worsening the damage while inspecting.
Gathering The Right Materials
Having the right tools is half the battle. For minor cracks, lightweight glue like foam-safe CA glue works wonders. For larger breaks, epoxy or a foam-safe adhesive tape can be more effective. Keep sandpaper and a small brush handy for finishing touches.
Preparing The Surface
Clean the damaged area thoroughly. Dust and dirt can prevent adhesives from sticking properly. Lightly sand the edges of the crack or break to ensure a smooth surface, which helps the adhesive bond better.
Applying Adhesive
For small cracks, apply a thin layer of glue along the crack using a brush. Hold the pieces together firmly for a few minutes to let the glue set. For breaks, apply a generous amount of epoxy to both sides and press them together until secure.
Reinforcing The Repair
Consider adding reinforcement for larger repairs. You can use lightweight fiberglass cloth or strips of foam-safe tape. This step adds strength and durability, ensuring your repair lasts through future flights.
Finishing Touches
Once the adhesive is dry, sand any rough edges for a smooth finish. You might need to repaint the area to match the rest of your plane. Take this opportunity to inspect other parts of your aircraft for signs of wear.
Testing The Repair
Before taking to the skies, test your repair. Gently press on the repaired area to ensure it’s secure. Conduct a short flight test to check the plane’s balance and performance. A successful repair feels as rewarding as a perfect flight. Are there any specific techniques that have worked wonders for your repairs?
Engaging with fellow enthusiasts can provide new insights and tricks to enhance your repair skills. Your experiences not only enrich your journey but also contribute to the collective wisdom of the RC plane community.
Replacing Missing Pieces
Fixing a Styrofoam RC plane kit is easy with basic tools. Use lightweight glue to attach missing parts. Sand edges smoothly for perfect alignment and improved performance.
Repairing your Styrofoam RC plane kit can be a satisfying experience, especially when you’ve identified the need to replace missing pieces. Whether it’s a wing, a tail, or another critical component, ensuring your plane is whole again is essential for optimal performance. Missing pieces not only affect the plane’s flight but can also lead to more severe damage if not addressed promptly.
Let’s explore how you can effectively replace these parts and get your RC plane soaring once more.
Identify The Missing Piece
Start by thoroughly inspecting your plane to identify what exactly is missing. Is it a small piece of the wing or an entire section of the fuselage?
Understanding the extent of the damage helps in sourcing the correct replacement parts. Make a list of all the missing components. This will keep you organized and ensure you don’t overlook any part.
Source The Right Replacement
Finding the right replacement parts might be easier than you think. Many hobby stores carry spare parts specifically for RC planes. You might be able to find exactly what you need without too much hassle. Online marketplaces like eBay or Amazon can also be goldmines for RC plane parts. Be sure to check the compatibility with your specific model.
Consider Diy Solutions
Sometimes, you might not find the exact part you need. This is where a little creativity can save the day. Foam board or lightweight cardboard can be excellent substitutes for missing pieces. Cut the material to match the missing part’s dimensions. Secure it with foam-safe glue and reinforce it with tape if necessary.
Reattach With Precision
Once you have your replacement piece, attaching it correctly is crucial. Use foam-safe adhesives to prevent any damage to the surrounding material. Align the new piece carefully and let the glue set completely before attempting to fly the plane again.
Test The Replacement
Before taking your plane back to the skies, conduct a ground test. Check that all parts are secure and that the plane is balanced. A short, low-altitude test flight can help you assess the effectiveness of your repair. Adjust as necessary to ensure a smooth flight.
Learn From The Experience
Every repair is an opportunity to learn. Ask yourself, what caused the piece to go missing? Was it a crash or a loose connection? Understanding the root cause can help prevent future damage.
Strengthen any weak spots and maintain your plane regularly for longevity. Replacing missing pieces in your Styrofoam RC plane kit can be a rewarding challenge. With the right approach, you can turn a frustrating situation into a learning experience.
Have you ever replaced a part on your RC plane? How did it go? Share your insights in the comments below!

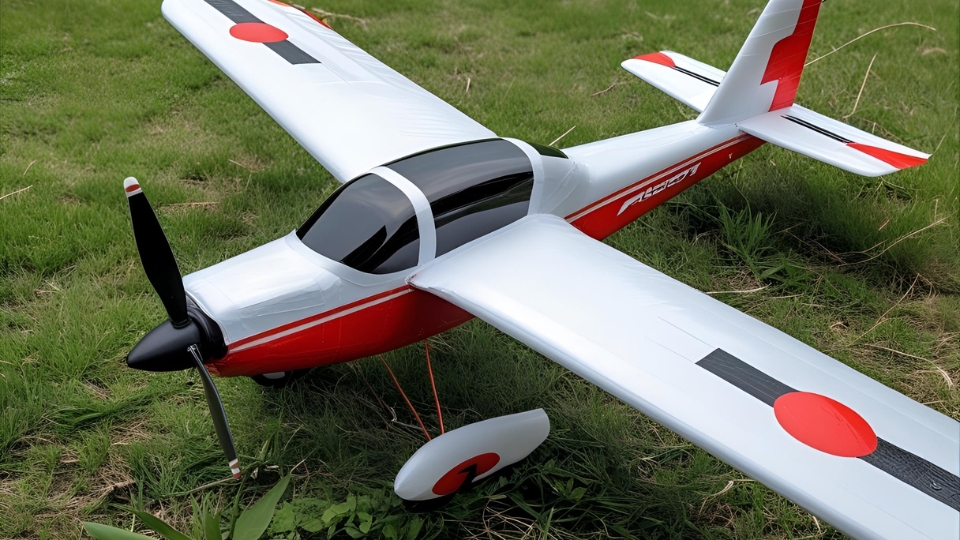
Credit: www.fmshobby.com
Reinforcing Weak Spots
Repairing a Styrofoam RC plane kit can be a rewarding task. The material is lightweight but can have weak spots. Identifying these areas and reinforcing them is crucial. It ensures the plane flies smoothly and lasts longer. With a few steps, you can strengthen these vulnerable parts effectively.
Identifying Weak Spots
Look for areas that bend easily. Check the wings and fuselage first. They often have the most stress. Look for cracks or dents. Use your fingers to press lightly. If it gives way, it’s a weak spot.
Using Reinforcement Tape
Reinforcement tape is simple to use. Cut a piece to fit the weak area. Apply it carefully over the spot. Smooth it out to remove air bubbles. This adds strength without adding much weight.
Applying Glue For Extra Strength
Glue can seal cracks well. Choose foam-safe glue. Apply it to the crack and let it dry. Hold the pieces together until they set. This makes the repair strong and secure.
Adding Carbon Fiber Rods
Carbon fiber rods add rigidity. They are light and strong. Cut them to fit the length of the weak area. Use glue to attach them to the plane. This prevents bending during flight.
Regular Maintenance Checks
Regular checks keep your RC plane in top shape. Look for new weak spots often. Reinforce them as needed. Keeping an eye on your aircraft ensures a longer lifespan.
Painting And Finishing Touches
Painting and adding finishing touches can breathe new life into a Styrofoam RC plane kit. This stage transforms a repaired plane into a visually appealing masterpiece. A well-painted model not only looks good but also adds a layer of protection. Here’s how to do it effectively.
Preparing The Surface
Ensure the plane is clean and dry before painting. Dirt or moisture can ruin the paint job. Use a soft brush or cloth to remove any debris. Lightly sand the surface for better paint adhesion. This step is crucial for a smooth finish.
Choosing The Right Paint
Select paint designed explicitly for Styrofoam. Regular paints can damage the material. Acrylic or water-based paints are safe choices. These options provide a vibrant finish without harming the surface.
Applying The Base Coat
Start with a thin base coat. It serves as the foundation for other layers. Use a broad brush for even coverage. Let it dry completely before proceeding. Patience ensures a flawless result.
Adding Details And Patterns
Use smaller brushes for intricate designs. Details make the plane unique and personalized. Stencils help in creating consistent patterns. Ensure each layer is dry before adding another.
Sealing The Paint
Finish with a clear sealant to protect the paint. Sealants prevent chipping and fading over time. Spray evenly from a distance to avoid drips. A well-sealed plane maintains its beauty longer.
Final Inspection
Examine the plane for any missed spots. Touch up areas as needed. Ensure all parts are securely attached. A thorough inspection guarantees a ready-to-fly model.

Credit: www.reddit.com
Testing The Repairs
After carefully repairing your Styrofoam RC plane kit, testing the repairs is crucial. This step confirms the plane’s readiness for smooth flights. Testing ensures all fixes hold up under pressure. It also helps identify any remaining issues, guaranteeing a successful flight. You want your plane to soar without hiccups.
Inspect The Visual Repairs
Begin by examining the repaired sections closely. Look for any signs of weakness or cracks. Ensure all glued parts are firmly attached. Check the wings and fuselage for smooth surfaces. Ensure paint or finish is evenly applied. Visual inspection helps spot obvious defects early.
Test The Strength
Gently apply pressure to repaired areas. Ensure they withstand gentle force without damage. This test confirms the robustness of your repairs. Pay special attention to joints and connections. They are often the weakest spots. Testing strength helps avoid surprises during flight.
Conduct A Balance Check
Balance is key to stable flights. Place the plane on a flat surface. Ensure it doesn’t tip or lean. Check the weight distribution across the wings. A balanced plane flies straight and true. Adjust weights if necessary. This simple check prevents in-flight issues.
Perform A Flight Test
Finally, take your plane for a test flight. Start with gentle maneuvers. Observe how it responds to controls. Ensure it maintains a steady flight path. Look for unusual sounds or vibrations. These may indicate underlying issues. A successful flight test confirms your repairs are effective.
Maintenance Tips
Maintaining a Styrofoam RC plane kit ensures longevity and optimal performance. Proper care prevents damage and keeps your plane flying smoothly. Regular checks and simple fixes can save time and money.
Inspect Your Plane Regularly
Regular inspection helps spot problems early. Check the wings and fuselage for cracks or dents. Examine the control surfaces to ensure they move freely. Look for loose connections in the wiring.
Keep It Clean
Dirt and debris can affect your plane’s performance. Wipe the surface with a soft cloth after each flight. Use a gentle cleaner to remove stubborn grime. Avoid harsh chemicals that can damage Styrofoam.
Store Properly
Proper storage extends the life of your RC plane. Store it in a cool, dry place to prevent damage. Avoid direct sunlight, which can warp the foam. Use a protective cover to shield it from dust.
Check Battery Health
Batteries need attention, too. Inspect them for swelling or leaks before every flight. Charge them with the correct charger to prevent damage. Store them at the recommended charge level.
Tighten Loose Parts
Loose parts can cause your plane to malfunction. Tighten screws and bolts regularly. Secure the propeller and landing gear. Use thread-locking compound if needed.
Repair Damage Promptly
Minor damages can become big problems. Repair cracks and dents as soon as you notice them. Use foam-safe glue for Styrofoam repairs. Test the plane after repairs to ensure stability.
Frequently Asked Questions
How Do I Fix A Cracked Styrofoam Wing?
To fix a cracked Styrofoam wing, use foam-safe glue. Apply the glue along the crack, then press the parts together. Allow the glue to dry completely. For added strength, reinforce the joint with lightweight tape. This method ensures a durable repair without adding significant weight to your RC plane.
What Glue Is Best For Styrofoam RC Planes?
Foam-safe CA glue is ideal for Styrofoam RC planes. It bonds quickly and doesn’t melt the foam. Epoxy is also a good choice for stronger joints. Always ensure the glue is compatible with Styrofoam to avoid damage. Test on a small area first if you’re unsure.
How Can I Reinforce My RC Plane’s Structure?
Reinforce your RC plane using carbon fiber rods or strips. Attach them to areas needing extra strength, like wings or fuselage. Use foam-safe glue for attachment. This reinforcement adds minimal weight but significantly boosts durability. Regularly inspect and maintain these reinforcements to ensure long-term performance.
Can I Paint Over Repaired Styrofoam?
Yes, you can paint over repaired Styrofoam. Use acrylic or water-based paints, as they won’t damage the foam. Avoid solvent-based paints, as they can dissolve Styrofoam. Ensure the repaired area is smooth and clean before painting for the best finish.
Multiple thin coats work better than a single thick one.
Conclusion
Repairing a Styrofoam RC plane can be simple. Gather the right tools first. Use foam-safe glue for effective repairs. Let the glue dry fully. Sand the repaired area gently. This ensures a smooth finish. Check the plane’s balance before flying again.
Regular maintenance helps avoid future damage. Practice makes perfect, so don’t worry. Each repair improves your skills. Enjoy flying your RC plane once again. Remember, patience is key. Happy flying!