Easy DIY Peony Wreath Using Coffee Filters: Simple Steps
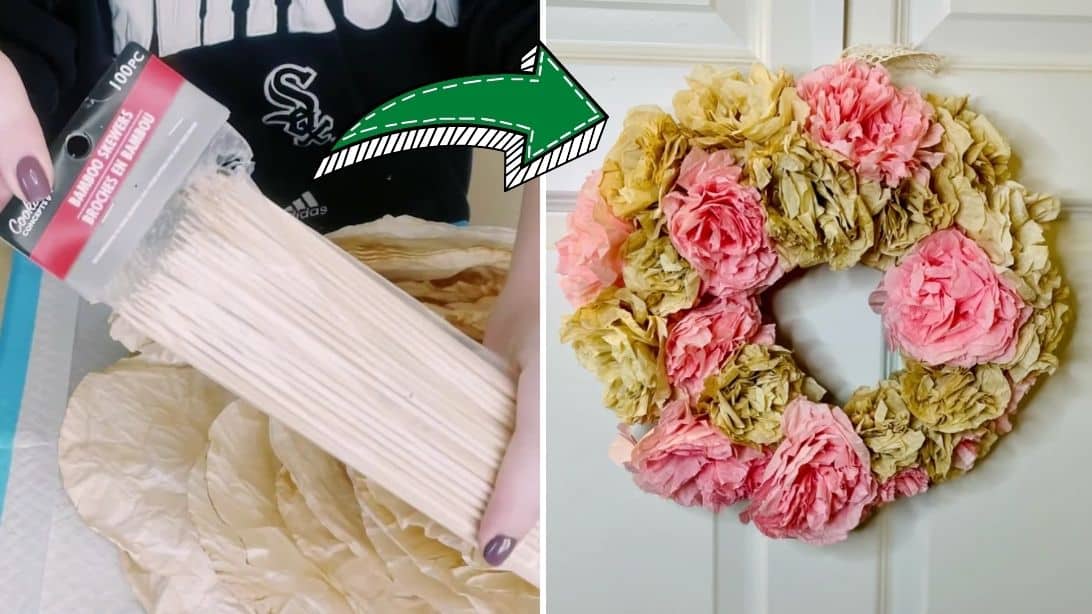
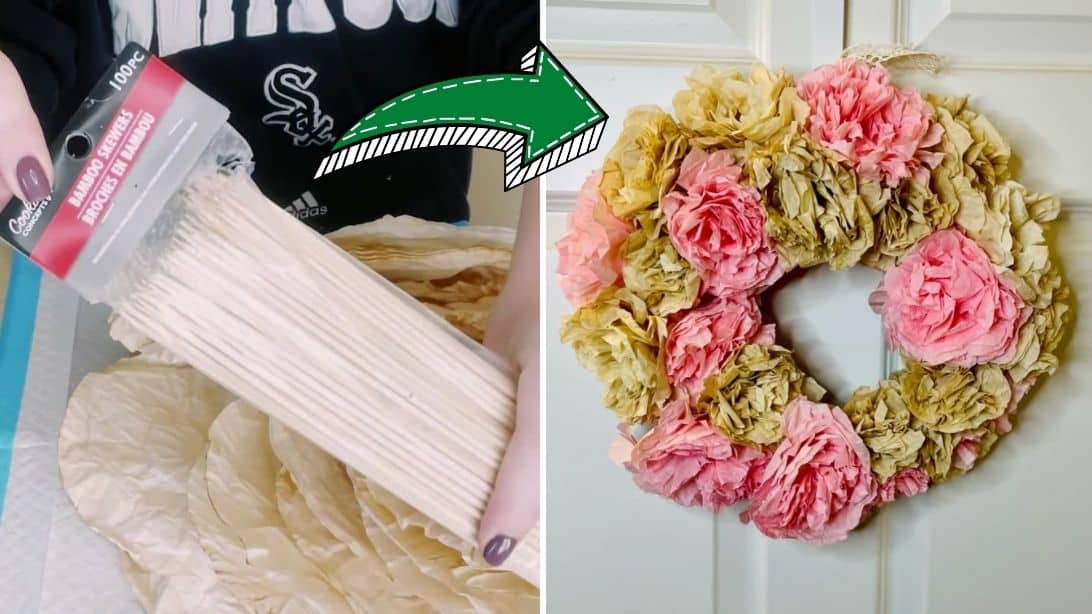
Imagine transforming your home with a burst of elegant beauty, all crafted by your own hands. The peony wreath, an exquisite piece of decor, can do just that.
But what if you could create this stunning masterpiece using something as simple as coffee filters? Yes, you! This isn’t just any DIY project; it’s the ultimate blend of creativity and simplicity. Picture yourself impressing guests with your unique, handmade wreath that radiates charm and sophistication.
It’s not only about crafting a decoration; it’s about crafting an experience that brings joy every time you look at it. Dive into this guide and discover how you can turn everyday items into extraordinary decor, effortlessly. Let your home reflect your style and creativity with this easy DIY peony wreath. Ready to make something beautiful? Let’s get started!
Credit: diyjoy.com
Materials Needed
Crafting a peony wreath with coffee filters requires few materials. Gather coffee filters, floral wire, scissors, and a glue gun. These simple items will transform into a beautiful wreath.
Creating a stunning peony wreath from coffee filters is not only a delightful craft project but also a fantastic way to add a personal touch to your home decor. Before diving into the creative process, let’s ensure you have everything you need. Gathering your materials beforehand will make the crafting experience smooth and enjoyable.
Coffee Filters
Coffee filters are the star of this project. They are inexpensive, easily available, and surprisingly versatile. You can transform them into delicate petals that mimic real peonies with just a bit of creativity.
Wire Wreath Frame
A wire wreath frame is essential for providing structure to your creation. Choose a size that fits your space. A medium-sized frame is often ideal for a front door or a cozy wall space.
Floral Wire
Floral wire is your friend when it comes to securing the coffee filter petals. It’s flexible yet sturdy enough to hold everything in place. You might find it useful to have different lengths handy for various sections of your wreath.
Scissors
Scissors are a basic yet crucial tool for this project. You’ll use them to cut and shape your coffee filters. Precision is key, so ensure your scissors are sharp and easy to handle.
Glue Gun
A glue gun is perfect for attaching your coffee filter peonies to the wire frame. It provides a strong hold that lasts. Be careful with the hot glue, and maybe keep a bowl of cold water nearby, just in case.
Watercolor Paints
Watercolor paints will bring your peony wreath to life with color. This is where you can get creative. Experiment with different shades of pink, white, or any color that suits your style. As you gather your materials, consider how each component contributes to the final look. Will you choose bold and bright colors or soft and subtle hues? The choice is yours, and each decision adds a personal touch. Do you have all the materials ready? Let your creativity flow and see where it takes you! Crafting your own peony wreath can be a rewarding experience, not just a task.
Preparing Coffee Filters
Creating a beautiful peony wreath starts with preparing the coffee filters. This part sets the foundation for the entire project. You’ll transform simple filters into stunning floral components. The process involves dyeing and drying the filters. These steps give the peonies their vibrant color and shape.
Dyeing The Filters
Begin by choosing your desired dye colors. You can use food coloring or fabric dye. Mix the dye with water in a shallow bowl. The amount of dye will determine the intensity of the color. Dip each coffee filter into the dye solution. Let it soak until it reaches the preferred shade. Experiment with different shades for variety.
After dyeing, gently squeeze the excess dye from the filters. Be careful not to tear them. Place the dyed filters on a paper towel. This will absorb extra moisture. The colors will appear lighter once dried.
Drying Process
Lay the dyed coffee filters flat on a clean surface. Ensure there’s enough space between each filter. This prevents them from sticking together. Allow them to air dry completely. This may take several hours, depending on the humidity.
For faster results, use a hairdryer on a low setting. Keep a safe distance to avoid damaging the filters. Once dried, the filters will be ready for crafting. They should feel crisp and retain their shape.
Creating Peony Petals
Crafting a peony wreath using coffee filters is simple and fun. These delicate petals bring elegance to any door. Perfect for adding a touch of nature indoors.
Creating beautiful peony petals is a delightful part of crafting a coffee filter wreath. These petals bring a delicate touch to your DIY project, making your wreath unique and charming. Coffee filters are ideal for creating realistic peony petals due to their texture and pliability. This section will guide you through cutting and layering techniques to craft stunning peony petals for your wreath.
Cutting Petal Shapes
Begin by flattening your coffee filters to prepare them for cutting. Use a pencil to draw petal shapes on the filters. Each petal should resemble a teardrop or oval shape. This shape mimics natural peony petals. Cut out the drawn shapes carefully using scissors. Ensure your cuts are smooth for an elegant finish. Vary the size of the petals to add dimension and depth to your peony.
Layering Techniques
Layering is crucial to creating lifelike peony petals. Take several cut petals and place them together. Start with larger petals at the bottom to form the base. Gradually add smaller petals on top to create fullness. Use a small dab of glue at the base of each petal to hold them together. Continue layering until you achieve the desired fullness. Adjust the petals to create natural curves, enhancing the peony’s realistic look.
Assembling The Wreath
Craft a stunning DIY peony wreath effortlessly using coffee filters. These everyday items transform into beautiful flowers. Perfect for adding a touch of elegance to your home decor.
Assembling the Wreath Creating a beautiful peony wreath using coffee filters is easier than you might think. Once you’ve prepared your petals, the next step is assembling them into a stunning wreath. Imagine the satisfaction of hanging your own handmade creation on your door! Let’s get started on bringing your peony wreath to life.
Attaching Petals To Frame
Start by selecting a wire or foam wreath frame. This will be the base for your peony petals. Take a petal and gently pinch it at the base to give it a natural curve. Use a hot glue gun to attach the petal to the frame, beginning at the outer edge and working your way inward. As you work, remember to overlap the petals slightly. This will give your wreath a full, lush appearance.
Securing With Floral Wire
After attaching a few petals, it’s time to secure them in place with floral wire. Cut small pieces of floral wire, about 2-3 inches long. Wrap the wire around the base of the petals and the frame. Twist the wire ends together to hold everything snugly. This will ensure your petals stay put, even in windy conditions. Are you seeing the peony shape take form? It’s a rewarding moment when you realize your wreath is coming together beautifully. Keep adding and securing petals until your wreath is full and vibrant. Don’t worry if it doesn’t look perfect—imperfections add character and charm. Step back occasionally to check your progress. Would you like more petals in certain areas? Adjust as needed to achieve the look you desire. As you finish, imagine the compliments you’ll receive from visitors admiring your handiwork. Your peony wreath is not just a decoration; it’s a testament to your creativity and effort. Enjoy the process and the final result!
Adding Finishing Touches
Transform coffee filters into a beautiful peony wreath. Simple steps make it easy to craft and decorate. Add a ribbon for an elegant finish.
Adding the final touches to your DIY peony wreath enhances its beauty. These steps make your wreath look more realistic and appealing. With a few simple techniques, your project will look stunning.
Enhancing With Leaves
Adding leaves gives your wreath a natural feel. Use green paper or fabric to create leaves. Attach them around the peonies using glue or wire. Space them evenly to create balance. This adds depth and contrast to your wreath. Choose shades of green that complement your peonies. This variety adds a lively element to your creation.
Adjusting Petal Placement
Proper petal placement ensures your peonies look full and vibrant. Gently adjust each petal for a natural appearance. Use your fingers to spread them out evenly. This small step makes a big difference. It adds volume and life to your flowers. Make sure each petal sits well with its neighbors. This harmony creates a cohesive look. Your wreath will look lush and inviting.

Credit: www.thestonybrookhouse.com
Displaying Your Wreath
Your DIY peony wreath is a beautiful creation. Now, it’s time to showcase it. Displaying your wreath correctly enhances its beauty. It can brighten any space. Knowing where and how to display it makes a difference. Consider location and decoration style for best results.
Choosing The Location
Choose a location that highlights your wreath. Front doors are popular choices. They welcome guests with a touch of elegance. Walls in living rooms can also be ideal. Ensure it’s at eye level for maximum impact. Kitchens and hallways can offer unique display spots. Your wreath can cheer up any corner. Ensure the area complements the wreath’s colors.
Seasonal Decoration Ideas
Match your wreath with the current season. In spring, add pastel ribbons. Summer can bring vibrant colors into play. In autumn, consider adding small leaves. Winter could invite a touch of silver or gold. Adapting your wreath to seasons keeps it fresh. It offers a new look without much effort. This approach keeps your décor lively and relevant.

Credit: www.thestonybrookhouse.com
Frequently Asked Questions
How To Make Peony Wreath With Coffee Filters?
To make a peony wreath, start by coloring coffee filters with dye. Shape them into peony flowers using scissors. Attach the flowers to a wreath base using glue. This DIY project is cost-effective and adds a personal touch to your home decor.
What Materials Are Needed For Peony Wreath?
You’ll need coffee filters, dye or paint, scissors, a wreath base, and glue. These materials are easy to find and affordable. They allow you to create a beautiful wreath that resembles real peonies, perfect for decorating your home.
Can I Customize The Coffee Filter Colors?
Yes, you can customize the coffee filter colors using dyes or paints. Choose colors that match your decor or personal preference. This flexibility makes your peony wreath unique and adds a personalized touch to your home decorations.
How Long Does It Take To Make?
Creating a peony wreath using coffee filters can take around 2-3 hours. This includes dyeing, shaping, and assembling the flowers. The time investment is worth it, as the finished product is both beautiful and unique.
Conclusion
Creating a peony wreath with coffee filters is simple and fun. This DIY project adds charm to any space. Handmade wreaths offer a personal touch. Easy steps make it perfect for beginners. Coffee filters create delicate, realistic flowers. Enjoy crafting your unique decoration.
Share this creative activity with friends or family. Brighten your home with handmade beauty. Celebrate creativity and inspire others. Your space will feel more inviting. Try this project today and enjoy the results. Crafting brings joy and satisfaction. Let your creativity shine with this easy peony wreath.